
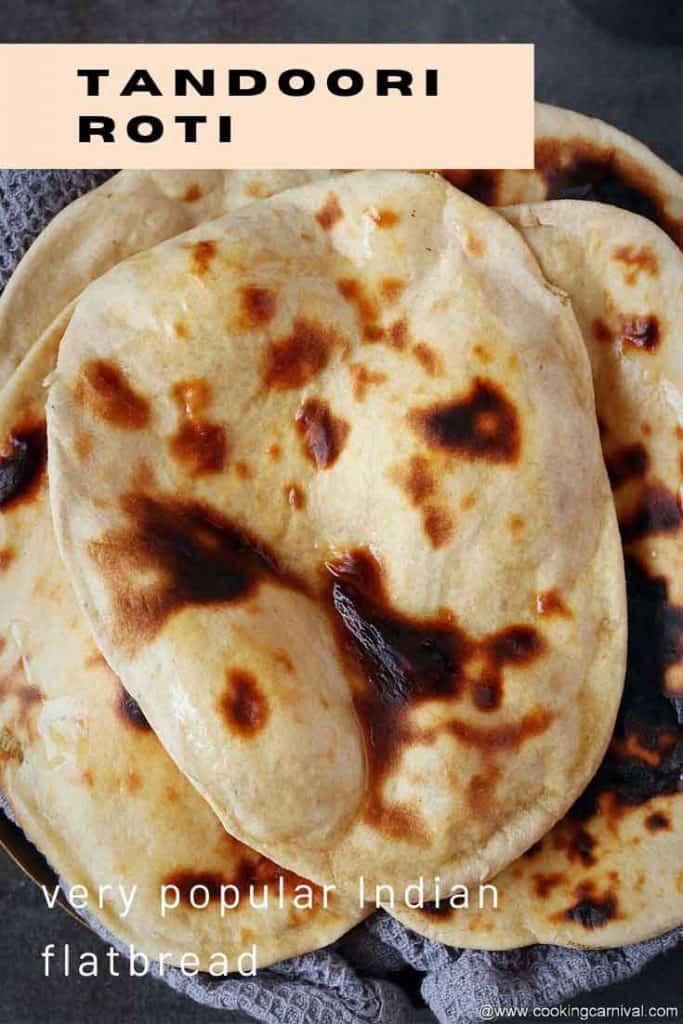

If you’re looking for a simple and delicious Tandoori roti recipe, just like the ones you find in restaurants, you are in the right place. This recipe delivers a perfect balance of texture and flavor, resulting in Tandoori roti that is crispy on the outside and soft on the inside, just like the ones you enjoy in Indian restaurants.

Jump to:
What is Tandoori Roti?
In every Indian household, roti is a staple that holds a special place at the dining table. The soft, warm roti goes well with a variety of dishes, whether it's a rich curry or a comforting bowl of dal. Just like the Naan, Tandoori roti is also a favorite.
Tandoori roti is a delicious Indian flatbread usually cooked in a tandoor, a traditional clay oven that reaches high temperatures and imparts a unique smoky flavor. It is often brushed with ghee or butter, adding a rich, indulgent taste.
Whenever I visit Indian restaurants, I find myself eagerly ordering naan or tandoori roti to accompany my favorite Punjabi curry or dal tadka. They complement the flavors so well.
Many of us do not have a tandoor available at home. If you are like me and have always wanted to enjoy delicious homemade Tandoori roti but lack this traditional cooking method, I'm happy to share an incredibly easy and exciting method to whip up this mouthwatering bread right on your stovetop.
You don't need fancy kitchen gadgets, just a cast-iron tawa, a pair of tongs, and a rack that can sit atop your gas or electric stove.
This recipe comes from my mother-in-law, and I can confidently say it never fails to impress. The result is a heavenly roti with a soft, pillowy texture that isn't chewy at all, just perfect for scooping up your favorite curry and enjoying every bite.

Ingredients required
Below is the ingredients list and possible substitutions. The exact ingredient amounts are in the printable recipe card at the bottom of this post.
This recipe of roti is made of
- Flour – I have used both whole wheat flour and all-purpose flour in this recipe. You can use only whole wheat flour too. My preferred brand of whole wheat here in the US is Sujata Gold atta.
- Yogurt – The addition of curd gives the roti a soft texture.
- Oil – Gives a bit of crisp texture
- Sugar and salt – For the taste
- Leavening agents – I use baking powder and baking soda to puff up the bread when we cook it. This makes the roti light.
- Ghee or butter for brushing the top

Step-by-step process
Step 1 – Make the dough
- To make the dough, mix maida, whole wheat flour, curd/yogurt, salt, oil, sugar, baking powder, and baking soda in a bowl. (image 1 to 4)
- Add water slowly and make a tight dough. Make sure the dough is not sticky or wet and is slightly stiff, just like paratha dough. (image 5)
- Knead the dough for 5 minutes until it is smooth. Cover the dough with a damp cloth and keep aside for 1 hour. (image 6)

Step 2 – Rolling
- Once one hour is done, knead the dough again for 2-3 minutes.
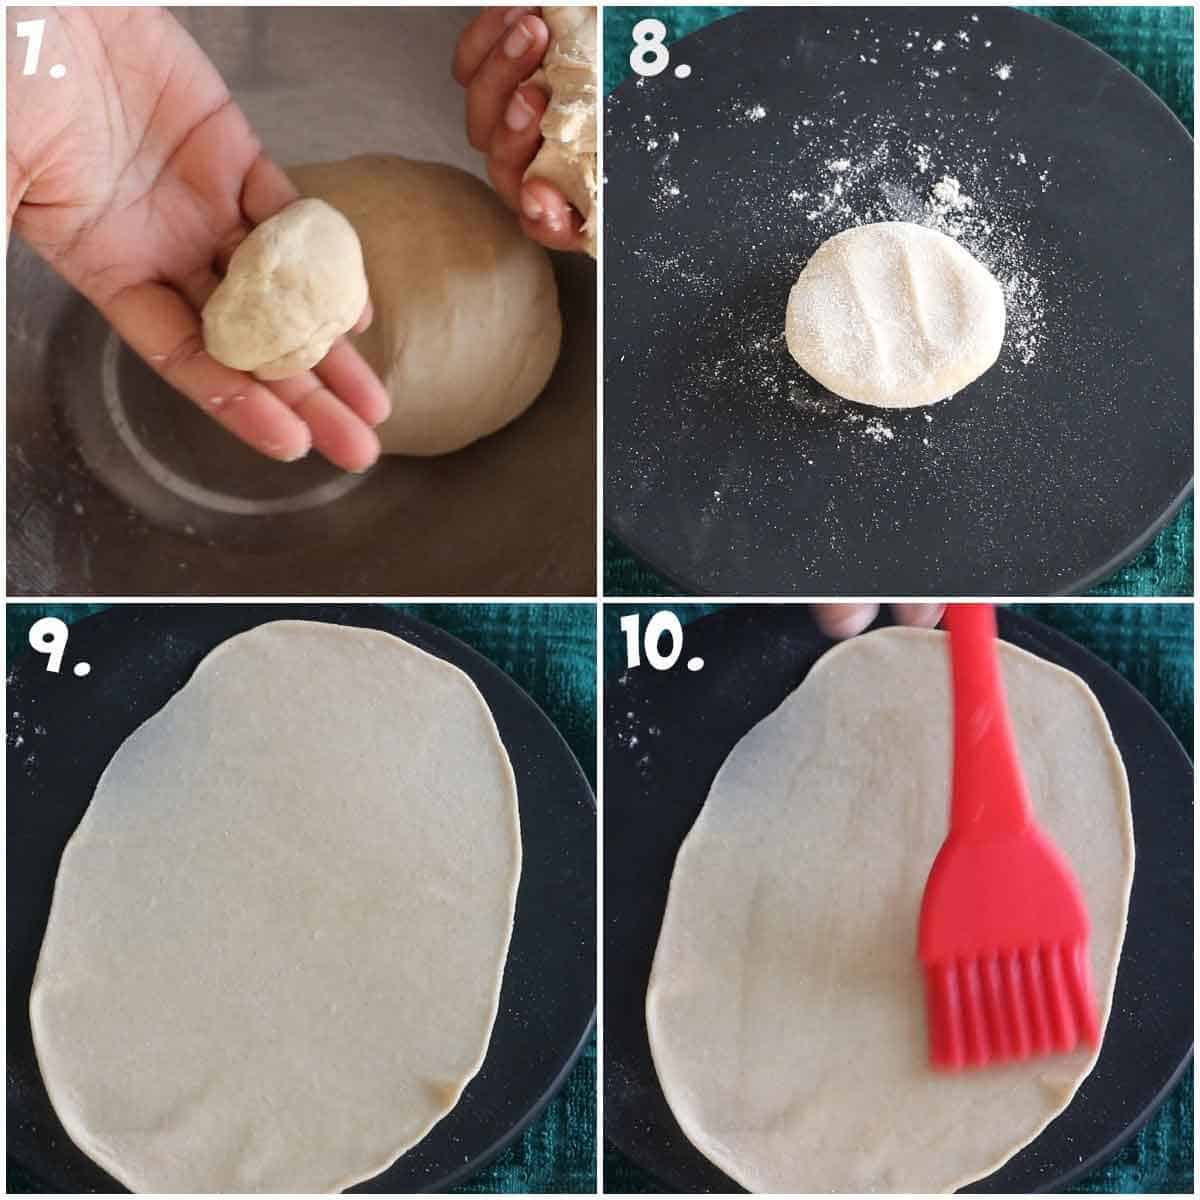
- Now divide the dough into ten equal parts. Make balls from each part. (image 7)
- Take one ball, and roll it to make a 6-inch oval or round-shaped roti. Remember that tandoori roti’s thickness is slightly more than phulka or paratha. (If you want to make garlic roti, at this point, apply some crushed garlic, onion seeds, and finely chopped cilantro and press it a little bit). (image 8 and 9)
Step 3 – cook on Tawa
- Note – I have an induction stove in my kitchen. So for this recipe, I place the rack first and then Tawa on a rack. If you have a gas stove, you can directly place tawa.
- Heat a Tawa. Use a slightly curved roti Tawa for this recipe, not nonstick pans.
- Now apple water on one side of the roti. Transfer the roti to the hot griddle with the waterside down. Tawa needs to be very hot before transferring the roti onto it. (image 10)
- As soon as the roti gets heated up, you will see huge and sometimes even large bubbles on the roti. Cook roti for 30 to 40 seconds on high heat. (image 11)
- Now, remove the rack, invert the Tawa and cook the roti on direct heat until brown spots appear. Keep moving the tawa so that all parts of the roti get cooked. (image 14)
- Bring back the Tawa to its original position on the stovetop.
- Carefully remove the roti from the Tawa. Apply ghee or butter on top and serve hot.

- The tawa will have a few stuck particles of cooked atta. Just scrape or wipe them off.
- Make the remaining rotis the same way.
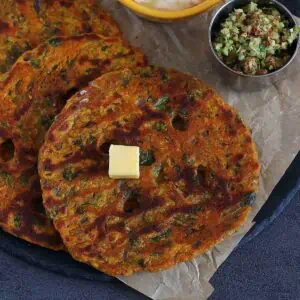
Variations
This tastes best with just butter or ghee, but you can use
- finely chopped green chilies and cheese
- only grated garlic
- finely chopped mint with garam masala
- stuff it with paneer.
- sesame seeds
- finely chopped onions with chaat masala
- Or try my favorite variation – Onion seeds, cilantro, and garlic

Notes, Pro-tips, and quick FAQs –
- Apply a generous amount of water on one side of the roti before roasting. This would ensure the rotis stick to the Tawa/cooker, cook properly, and will not fall on the stove during the cooking process.
- Don’t worry if a Couple of the first ones stick to the Tawa. Use a flat spatula and remove them from the tawa/griddle.
- Use only all-purpose flour to make tandoori naan without yeast!
- Always use an Iron Tawa for the best results. A non-stick griddle/Tawa never works for this recipe, as the roti doesn’t stick to the pan and easily falls off.
- Avoid adding a large amount of water to the flour all at once.
- Don't make big rotis as it will restrict even heating on the stovetop, and you will not get perfectly cooked Rotis.
- While rolling, don't use too much dry flour. Too much dry flour will prevent the roti from sticking to the cooking surface. Shake off excess dry flour before cooking.
- Ensure the Tawa is very hot before placing the roti on it.
Naan is a leavened flatbread that is fancier and heavier than roti, made using only all-purpose flour (also called maida in Hindi).
Tandoori Roti is an unleavened flatbread primarily made with whole wheat (atta) or a combination of whole wheat and all-purpose flour.
Yes, it is considered healthier than naan as it contains whole wheat flour/ atta.
You can serve it with any curry like
Palak paneer
Matar paneer
Malai kofta
Resmi Kaju Paneer
Paneer pasanda
Dum aloo
You can keep leftover rotis in the fridge. Re-heat on the tawa for 2-3 minutes. The texture may change slightly, though.
With the leftover dough, you can make pizza. Roll the dough, apply some sauce, add cheese and toppings of your choice and bake it in the oven or on the stovetop.
Yes, you can! Use one packet of ENO instead of baking soda and baking powder.
No! But you can make it gluten-free using gluten-free flour instead of regular flour.

More Indian flatbread recipes –
Have you tried this Recipe? Please feed us with your feedback, ★ star ratings, and comments below.
You can also FOLLOW me on FACEBOOK, INSTAGRAM, and PINTEREST for more fabulous recipes and updates.
Subscribe to our YouTube Channel for tasty and easy video recipes.

Tandoori roti
Ingredients
- 2 cups – Whole wheat flour (atta)
- ½ cup – All-purpose flour (maida)
- 4 tablespoon – Yogurt
- 2 tablespoon – Oil
- 1 teaspoon – Sugar
- ¼ teaspoon – Salt
- 1 teaspoon – Baking powder
- ¼ teaspoon – Baking soda
- ¾ cup – Water. Or as needed
Method
- To make the dough, mix maida, whole wheat flour, curd/yogurt, salt, oil, sugar, baking powder, and baking soda in a bowl.
- Add water slowly and make a tight dough. Make sure the dough is not sticky or wet and is slightly stiff dough just like paratha dough.
- Knead the dough for 5 minutes until it is smooth. Cover the dough with a damp cloth and keep aside for 1 hour.
- Once one hour is done knead the dough again for 2-3 minutes.
- Now divide the dough into 10 equal parts. Make balls from each part.
- Take one ball, roll it to make a 6-inch oval or round shaped roti. Keep in mind that, the thickness of tandoori roti is slightly more than phulka or paratha.
- Heat a Tawa. Use a slightly curved roti Tawa for this recipe and not the nonstick pans. (Note – I have an induction stove in my kitchen. So for this recipe, I placed wire rack first and then Tawa on a rack. If you have a gas stove, you can directly place tawa.)
- Now apple water on one side of the roti. Transfer the roti on the hot griddle with the waterside down. Tawa needs to be very hot before transferring the roti on to it.
- As soon the roti gets heated up, you will see huge and sometimes even large bubbles on the roti. Cook roti for 30 to 40 seconds on high heat.
- Now, take away the rack, invert the Tawa and cook the roti on direct heat until brown spots appear. Keep moving the tawa so that all parts of the roti gets cooked.
- Bring back the Tawa to its original position on the stovetop.
- Carefully remove the roti from the Tawa. Apply ghee or butter on top and serve hot with your favorite curry or dal.
- The tawa will have a few stuck particles of cooked atta. Just scrape or wipe them off.
- Make remaining Rotis same way
- Roll the roti, apply some crushed or chopped garlic, some kalonji(onion seeds), and finely chopped cilantro. Press a little bit.
- Apple water on the backside of the roti.
- Transfer the roti on the hot griddle with the waterside down. Tawa needs to be very hot before transferring the roti on to it.
- As soon the roti gets heated up, you will see huge and sometimes even large bubbles on the roti. Cook roti for 30 to 40 seconds on high heat.
- Now, take away the rack, invert the Tawa and cook the roti on direct heat until brown spots appear. Keep moving the tawa so that all parts of the roti gets cooked.
- Bring back the Tawa to its original position on the stovetop.
- Carefully remove the roti from the Tawa. Apply ghee or butter on top and serve hot.
Nutrition
Notes
- finely chopped green chilies and cheese
- only grated garlic
- finely chopped mint with garam masala
- Stuff it with paneer.
- sesame seeds
- finely chopped onions with chaat masala
- Apply a generous amount of water on one side of the roti before roasting. This would ensure the rotis stick to the Tawa/cooker, cook properly, and will not fall on the stove during the cooking process.
- Don’t worry if a Couple of the first ones stick to the Tawa. Use a flat spatula and remove them from the tawa/griddle.
- To make tandoori naan without yeast, use only all-purpose flour!
- Always use an Iron Tawa for the best results. A non-stick griddle/Tawa never works for this recipe, as the roti doesn’t stick to the pan and easily falls off.
- Avoid adding a large amount of water to the flour all at once.
- Don't make big rotis as it will restrict even heating on the stovetop, and you will not get perfectly cooked Rotis.
- While rolling, don't use too much dry flour. Too much dry flour will prevent the roti from sticking to the cooking surface. Shake off excess dry flour before cooking.
- Ensure the Tawa is very hot before placing the roti on it.
- You can refrigerate the dough for up to 3 days.
Private Notes
Tried this recipe?
Let us know We would love to hear your thoughts! Please leave your comments, ratings, and any ideas or changes you think could help us make our recipes even better. Thank you for your feedback!Warm regards,
Dhwani.


Tried this recipe today , Roti turned out super soft and delicious.
Hi Anushri!
I am so glad to know that this recipe turned out well and you liked it. Thanks for sharing your feedback.
Super easy recipe. Loved the roti.. thnx much Dhwani for sharing recipe.
Thanks, Grace! Glad you loved the Roti. 🙂
Pls add the measurements.
Everything is given on a recipe card. Please have a look. Thank you.
Hey, can I use self raising flour for this? Thanks
Yes, you can.