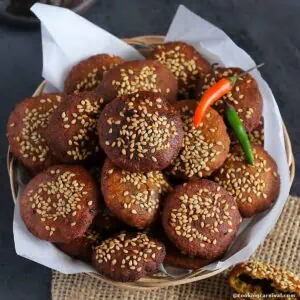
Vegan, flavorful and so addictive, this Gujarati Dal Vada is easy to make at home and requires only a handful of ingredients.
These are crispy from the outside and soft, spongy, and fluffy from the inside. This Gujarati snack is best enjoyed during the rainy season with sliced onions, green chutney, fried green chilies on the side, and of course a hot cup of tea.
These crispy dal vadas are perfect for entertaining and make a delicious appetizer for a small get-together, party, or any occasion. These are so addictive that you can’t stop eating them.

Jump to:
About Gujarati Dal Vada Recipe
Dal translates to lentils, and vada means round-shaped fritters. This Gujarati dal vada is different from South Indian Chana Dal Pakoda.
The main ingredient of this Gujarati dal vada is Chilka Moong Dal (moong lentil with skin).
Aromatics like onions, cilantro, ginger; green chilies, and cumin seeds give a lovely flavor and taste to Dal Vada.
This Chilka moong dal recipe is so popular all over Gujarat, especially in Ahmedabad. You will see many street vendors selling them. They give you the hot, fried dal wada wrapped in the newspaper with onion and fried green chilies.
Making them at home is very easy. It tastes the same as street stalls, so good, perfect, and addictive. I would say the preparation of this dal vada is similar to falafel. The taste is also somewhat similar.
Apart from the soaking time it takes to soak the Moong dal, this vada takes very little time to cook and serve.
The key to making the best dal vada is getting the right batter consistency and keeping the oil temperature for frying right.
In this recipe, I am sharing all the tips and tricks I have learned from my MIL.

Why do I love this recipe?
- one of the very popular Gujarat street food
- crispy, crunchy, and tasty and makes for a great tea-time snack.
- vegan and can be made gluten-free
- very easy to make, delicious, crispy, and flavorful
- made with simple pantry ingredients
- Perfect for any party or gathering.
Ingredients required
- Chilka Moong dal (Split moong dal with skin – Main ingredient.
- Ginger – for the extra flavor and it also helps indigestion.
- Cilantro – for the freshness.
- Onion – For the crunch. If you are making it Jain or no onion no garlic version, skip it.
- Green chilies – for spice things up. You can skip or reduce the quantity too.
- Cumin seeds – for the robust flavors.
- Other ingredients – You will also need salt and oil for frying.

Step-by-step process
Soaking Moong Dal
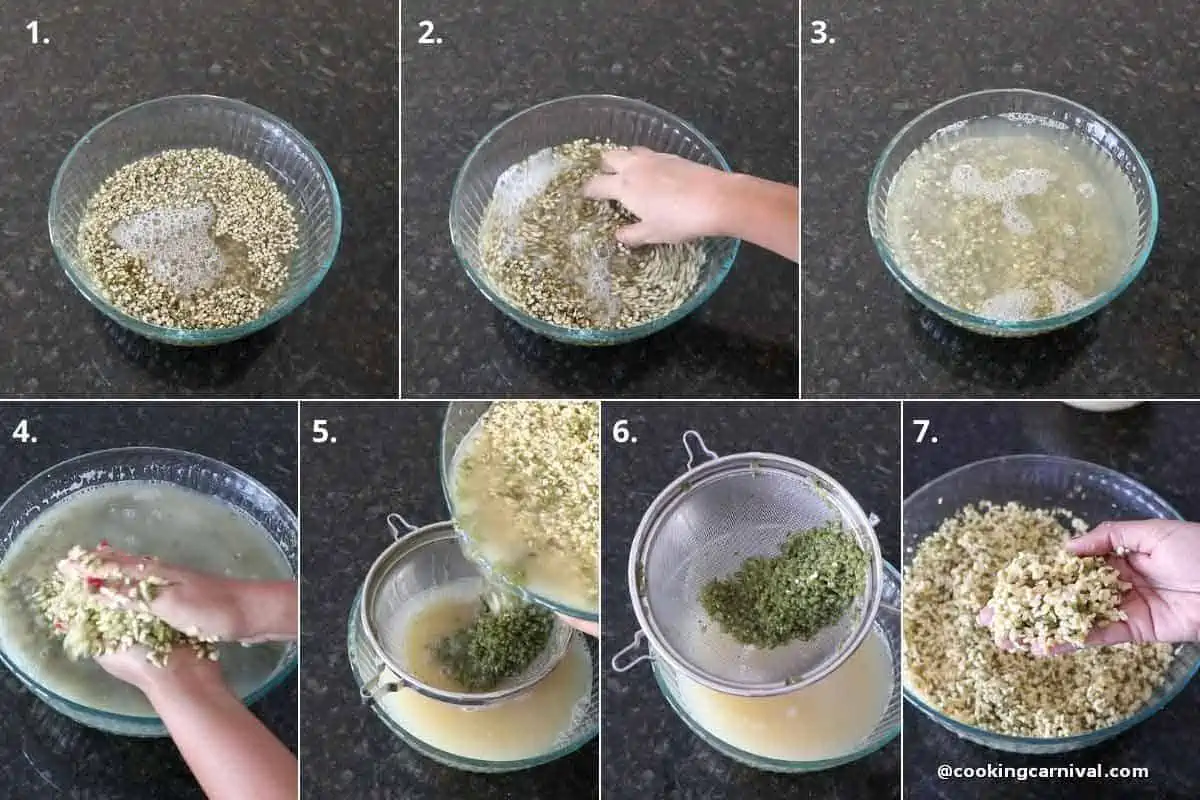
- Rinse chilka moong dal a couple of times in water. (Image 1 and 2)
- Soak the lentils in 6 cups of water for 4 to 5 hours. (Image 3)
- After the soaking time, rub the dal between your fingers, so most of the skin will come off. Keep rubbing and massaging till 80% of the skin is came off the dal. You can see now that very few dal have skin. (image 4)
- Note – This step is very important.
- Now drain the water and the skin will float on top, remove that too. Drain the soaked lentils very well. There should be no water in the soaked dal. (Image 5 to 7).
Making Dal Vada Mixture
- Then add the soaked lentils, green chilies, and ginger to a mixer-grinder or food processor. A food processor works best here as we want coarse batter. (Image 8 and 9)
- Without adding any water, grind to a coarse mixture. If you are not able to grind at all, then add 1 to 2 tablespoons of water. (Image 10)
- Remove the batter to a bowl and add salt. Mix and stir vigorously with your clean hand for about 3 to 4 minutes. It will make the batter light, airy and fluffy. This makes light and spongy dal vada without adding any baking soda. (Image 11 and 12)
- Now add chopped cilantro, onion, cumin seeds, and hing (Skip for gluten-free version). Mix everything well. (Image 13)
- Check the taste and add more salt if needed.

Frying
- Heat oil for deep frying in a Kadai or pan on medium heat.
- Once the oil is hot add a spoonful of batter by using a small spoon or your hand. I like to make small dal vada. You can mould them according to your preferred size. (Image 14)
- Keep moving and frying till they become golden and crisp. (Image 15)
- Remove it to a paper towel-lined plate to get rid of extra oil.
- Fry the remaining dal vada this way in batches.
- In the end, fry green chilies in the hot oil. (Image 16 and17)

- Serve the dal vada with onion, fried chilies, and hot up chai.

Notes, pro-tips, and quick FAQs
- Adjust the green chilies according to your taste.
- While grinding, do not add water at all. Just pulse the lentils twice or thrice in short intervals for a very coarsely ground batter.
- I like to fry these vadas in peanut oil for that amazing flavor. You can use any oil.
- Want to skip the rubbing and removing skin steps? Use half of yellow moong dal (without skin) and half of moong dal with skin.
- Do stir or whisk the batter well for about 4 to 5 minutes to aerate and fluff up the batter. This makes the spongy, light, and fluffy dal vada from inside.
- You can add 2-3 cloves of garlic while grinding the dal.
- If the ground dal paste seems loose, you can add rice flour to thicken it & deep-fry them immediately.
- After adding onions and cilantro to the dal batter, deep-fry the vadas immediately. The onion will make the batter lose and watery.
- Make sure to keep the flame at medium and even while deep-frying to ensure even cooking of the vadas.
- To keep fried vadas crispy for a long time, make sure the batter consistency is perfect and you fry them in medium flame until crispy and golden.
- Avoid soaking dal for more than 5 hours. Soaking them for a longer time will not make them crispy and crunchy.
- The consistency of the ground mixture is thick and coarse. Do not make it fine.
- You can easily scale the recipe and halve or double the recipe.
- To make a gluten-free version, skip the asafetida or add gluten-free asafetida.
The batter can be stored for 3-4 days in the refrigerator. You can make vadas freshly as you need.
If you have leftover vada, you can store it 3 to 4 in the fridge. You can also freeze them for 3 to 4 months in an air-tight container.
You sure can!
You can use chana dala instead of moong dal. Mixed lentils work great too.
You sure can!
Heat the Appe pan on medium heat.
Brush the cavities of the Appe pan with oil.
Place the dal vadas in the greased cavities of the Appe pan.
Brush vadas on top with oil.
Cover and cook on medium-low heat for 6-8 minutes until golden brown, turning them halfway through the cooking process.
Deep-fry these vadas the second time over a low flame to make them extra crispy.
Roadside vendors in Ahmedabad serve dal vada with onion and fried green chilies. But you can serve it with green chutney, ketchup, or coconut chutney.
You can make moong dal dhokla or moong dal chilla with leftover batter.

More Snack Recipes
Have you tried this Recipe? Please feed us with your feedback, ★ star ratings, and comments below.
You can also FOLLOW me on FACEBOOK, INSTAGRAM, and PINTEREST for more fabulous recipes and updates.
Subscribe to our YouTube Channel for tasty and easy video recipes.
Gujarati Dal Vada
Ingredients
- 3 cups Chilka Moong Dal Split Moong dal with skin
- 2 inch Ginger
- 5-6 green chilies Adjust according to your taste
- 2 teaspoon salt or to taste
- 2 teaspoon cumin seeds
- ¾ cup dinely chopped cilantro
- 1 cup finely chopped onion
- ¼ teaspoon hing Avoid to make gluten-free
- Oil for frying
Instructions
Soaking Moong Dal
- Rinse chilka moong dal a couple of times in water.
- Soak the lentils in 6 cups of water for 4 to 5 hours.
- Note – This step is very important.After the soaking time, rub the dal between your fingers, so most of the skin will come off. Keep rubbing and massaging till 80% of the skin is came off the dal. You can see now that very few dal have skin.
- Now drain the water and the skin will float on top, remove that too. Drain the soaked lentils very well. There should be no water in the soaked dal.
Making Dal Vada Mixture
- Then add the soaked lentils, green chilies, and ginger to a mixer-grinder or food processor. A food processor works best here as we want coarse batter.
- Without adding any water, grind to a coarse mixture. If you are not able to grind at all, then add 1 to 2 tablespoons of water.
- Remove the batter to a bowl and add salt. Mix and stir vigorously with your clean hand for about 3 to 4 minutes. It will make the batter light, airy and fluffy. This makes light and spongy dal vada without adding any baking soda.
- Now add chopped cilantro, onion, cumin seeds, and hing (Skip for gluten-free version). Mix everything well.
- Check the taste and add more salt if needed.
Frying
- Heat oil for deep frying in a Kadai or pan on medium heat.
- Once the oil is hot, drop marble-sized batter with your hand or a spoon, I like to make small dal vada. You can make them according to your preferred size.Drop a few vadas at a time. Dont overcrowd the frying pan.
- Let the vada fry for a minute untouched. then flip the vadas. Now Keep moving and frying till they become golden and crisp.
- Remove it to a paper towel-lined plate to get rid of extra oil.
- Fry the remaining dal vada this way in batches.
- In the end, fry green chilies in the hot oil.
- Serve the dal vada with onion, fried chilies, and hot up chai.
Video
Notes
- Adjust the green chilies according to your taste.
- While grinding, do not add water at all. Just pulse the lentils twice or thrice in short intervals for a very coarsely ground batter.
- I like to fry these vadas in peanut oil for that amazing flavor. You can use any oil.
- Want to skip the rubbing and removing skin steps? Use half of yellow moong dal (without skin) and half of moong dal with skin.
- Do stir or whisk the batter well for about 4 to 5 minutes to aerate and fluff up the batter. This makes the spongy, light, and fluffy dal vada from inside.
- You can add 2-3 cloves of garlic while grinding the dal.
- If the ground dal paste seems loose, you can add rice flour to thicken it & deep-fry them immediately.
- After adding onions and cilantro to the dal batter, deep-fry the vadas immediately. The onion will make the batter lose and watery.
- Make sure to keep the flame at medium and even while deep-frying to ensure even cooking of the vadas.
- To keep fried vadas crispy for a long time, make sure the batter consistency is perfect and you fry them in medium flame until crispy and golden.
- Avoid soaking dal for more than 5 hours. Soaking them for a longer time will not make them crispy and crunchy.
- The consistency of the ground mixture is thick and coarse. Do not make it fine.
- You can easily scale the recipe and halve or double the recipe.
- To make a gluten-free version, skip the asafetida or add gluten-free asafetida.
- This recipe yields 12 servings of vada. 1 serving equals 10 to 12 vada (depending on the size).
Nutrition
Warm regards,
Dhwani.



This portion is enough to feed a baraat!