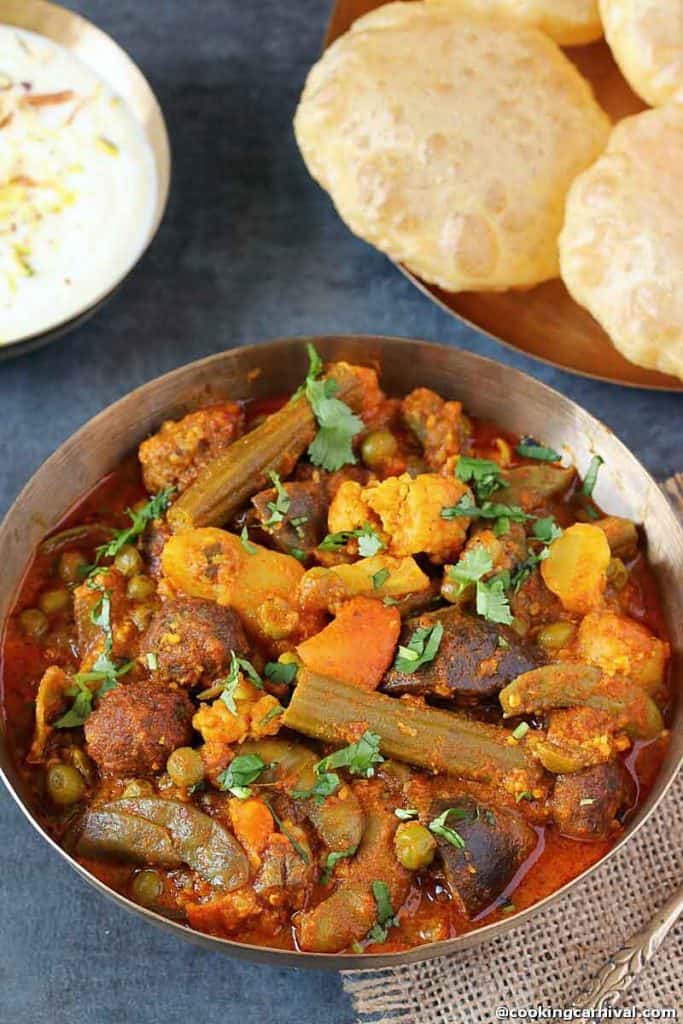
Wintery bliss for almost every Gujarati – Undhiyu is a traditional mixed vegetable curry recipe from Gujarati, India. It’s a feast in itself!
Today I am sharing the traditional way and an easy way (in a pressure cooker) to make this Undhiyu recipe with fresh and frozen vegetables.
Jump to:
What is Undhiyu?
Undhiyu is a Gujarati mixed vegetable curry/sabzi that is a regional specialty of Gujarat.
Gujarati word “Matlu” meaning earthen pot and “Undhu” meaning upside down since they have been traditionally cooked upside down underground in earthen pots fired from above.
Vegetables are spiced with ginger, garlic, green chili, peanuts, sesame seeds, chili powder, cumin-coriander powder, sugar and sometimes includes freshly grated coconut.
This recipe is made during wintertime when the Undhiyu vegetables are freshly available in abundance. We, Gujaratis, make Undhiyu on special occasions like Diwali and Uttarayan. It also gets the prime importance in all family functions and gets together.
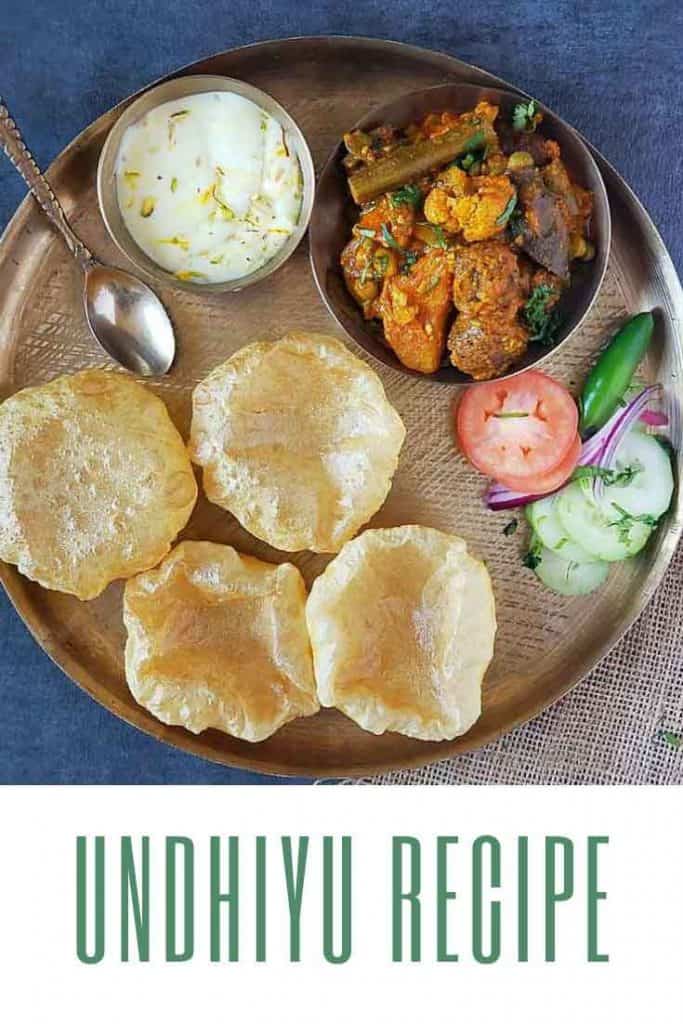
My favorite way to enjoy Undhiyu is eating as is. But I also enjoy it with hot puris and shrikhand.
As I said this recipe is made mainly during the winter season as the vegetables like Surti papdi, lilva and methi are only available during this season. But nowadays you can enjoy it all year long. Thanks to frozen vegetables.
Undhiyu is a Surat specialty like this Surti Locho. But many Gujarat regions and families have their version and way of making it.
There are 4 types of Undhiyu
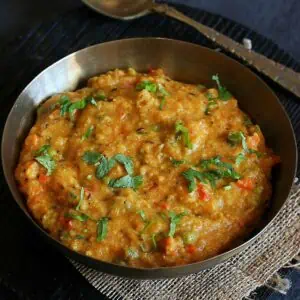
Chapdi Undhiyu – It is cooked in tomato and onion gravy and it’s liquidy like dal.
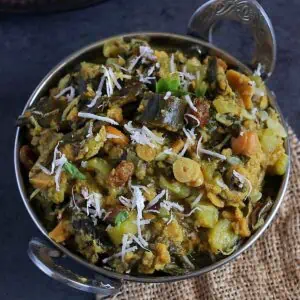
Surti Undhiyu – In this version vegetables are stuffed with the green masala. This is a dry version of Undhiyu. ( I will try to share this recipe sometime this year).
Maatla undhiyu – This version is very popular in South Gujarat. In this version, vegetables are steam cooked in a traditional clay pot and is also known as Umbadiyu.
Kathiyawadi Undhiyu – Today I am sharing the Kathiyawadi Undhiyu recipe (the way I grew up eating).
Regardless of which way you prepare it, it’s tastes heavenly delicious.
Procedure of undhiyu
The Recipe looks lengthy, but it is very easy to make. Let’s divide the whole procedure into 3 steps:
Make muthia: You can prepare a day before. I usually make a big batch and freeze them. It comes in handy to make a quick undhiyu. I have made deep-fried methi muthiya. But you can cook them in an appe pan or air fryer.
Make undhiyu masala – you can also prepare this a day or two before.
Prep veggies and Cook undhiyu on a stovetop or in a pressure cooker (instant pot).
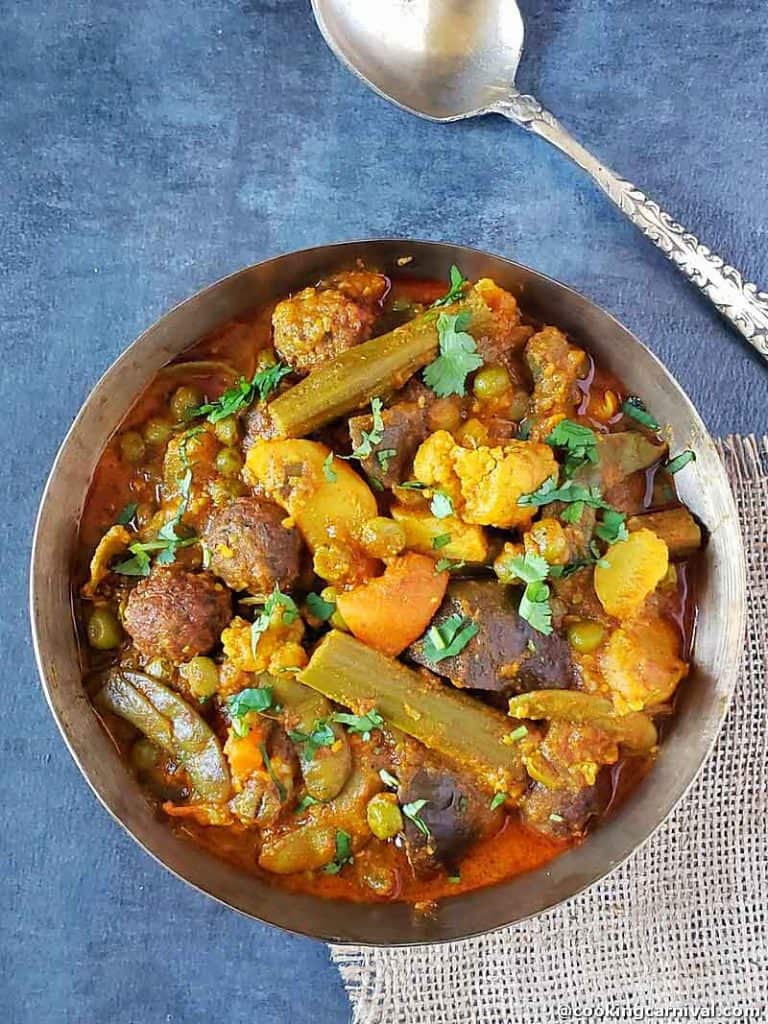
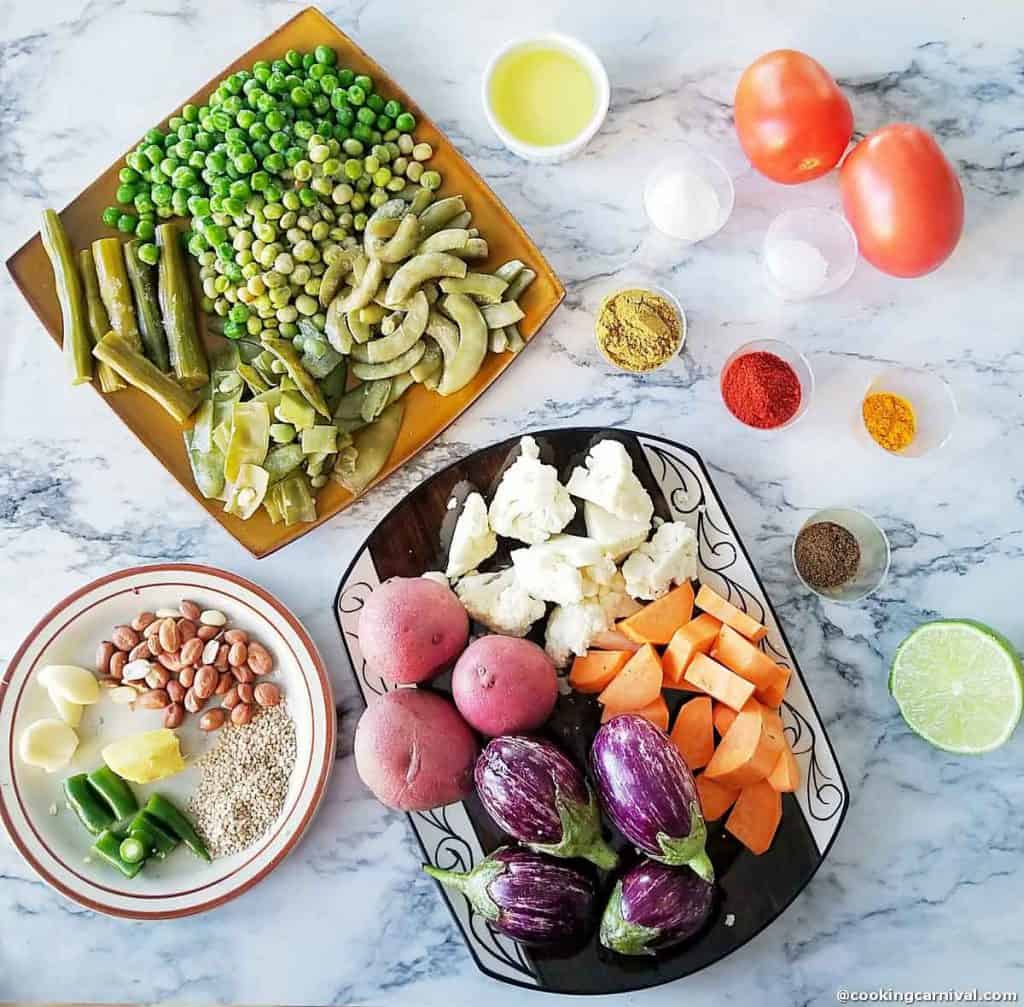
Ingredients and substitution
You will need loads of vegetables (frozen and fresh).
- Eggplant – Choose a small and fresh variety of eggplant.
- Potatoes – baby potatoes works best. You may choose any potatoes of your choice.
- Sweet potatoes – It gives a natural sweetness to the dish. You may use ripe bananas too.
- Cauliflower – Again try to use good quality and fresh cauliflower.
- Fresh tomatoes
- Frozen vegetables – I have used some frozen vegetables like Tuver (lilva), green peas, surti papdi, drumstick, and valor. Please use fresh if it’s available in the market/grocery stores. Fresh makes difference in taste.
- Fresh tomatoes
- Substitution –
- if tuver is not available, you can use edamame too. You may also add raw bananas to this recipe.
- Use purple yam (ratalu) if it’s available.
For masala
- To grind into a coarse paste, you will need
- Peanuts – you can almonds too if you allergic to peanut
- Sesame seeds – brown or white tal or til, do not use black sesame seeds.
- Ginger-garlic-green chilies – Use fresh.
- Red chili powder – I have used Kashmiri red chili powder. It gives a nice color and its mild taste.
- Cumin-coriander powder, turmeric powder, garam masala, and salt.
- Sugar – Sugar is a must in Kathiyadi style undhiyu recipe. You can substitute it with jaggery.
- Lemon juice – Little bit of lemon juice elevates the freshness and taste.
- Oil – So you will need a good amount of oil to get the best taste.
For Methi Muthiya
You can not imagine any undhiyu recipe without these delicious and aromatic fenugreek dumplings, they are the heart of this dish.
Be sure to make extra as half of them will vanish before they go in the dish, they are as tasty as our Methi na Gota.
- Fresh methi leaves – During winter, fresh methi is easily available. But if you don’t find it, you can use Kasuri methi. Soak Kasuri methi in warm water for 30 minutes, drain the water, and use them.
- Fresh cilantro – I always prefer to use a combination of cilantro and methi to make dhokla/muthia for my undhiyu recipe. Cilantro balances out the bitterness present in methi leaves.
- Chickpea flour – make sure the chickpea flour is fresh and doesn’t have a bitter taste.
- Sooji/semolina/Rawa – This gives nice texture and crunch to the methi muthiya/dhokli.
- Regular spices like red chili powder, cumin-coriander powder, turmeric powder, garam masala, salt, sugar, and lemon juice.
- Oil – regular cooking oil
- Baking soda – Adding baking soda will make muthiyas soft and melt in the mouth.
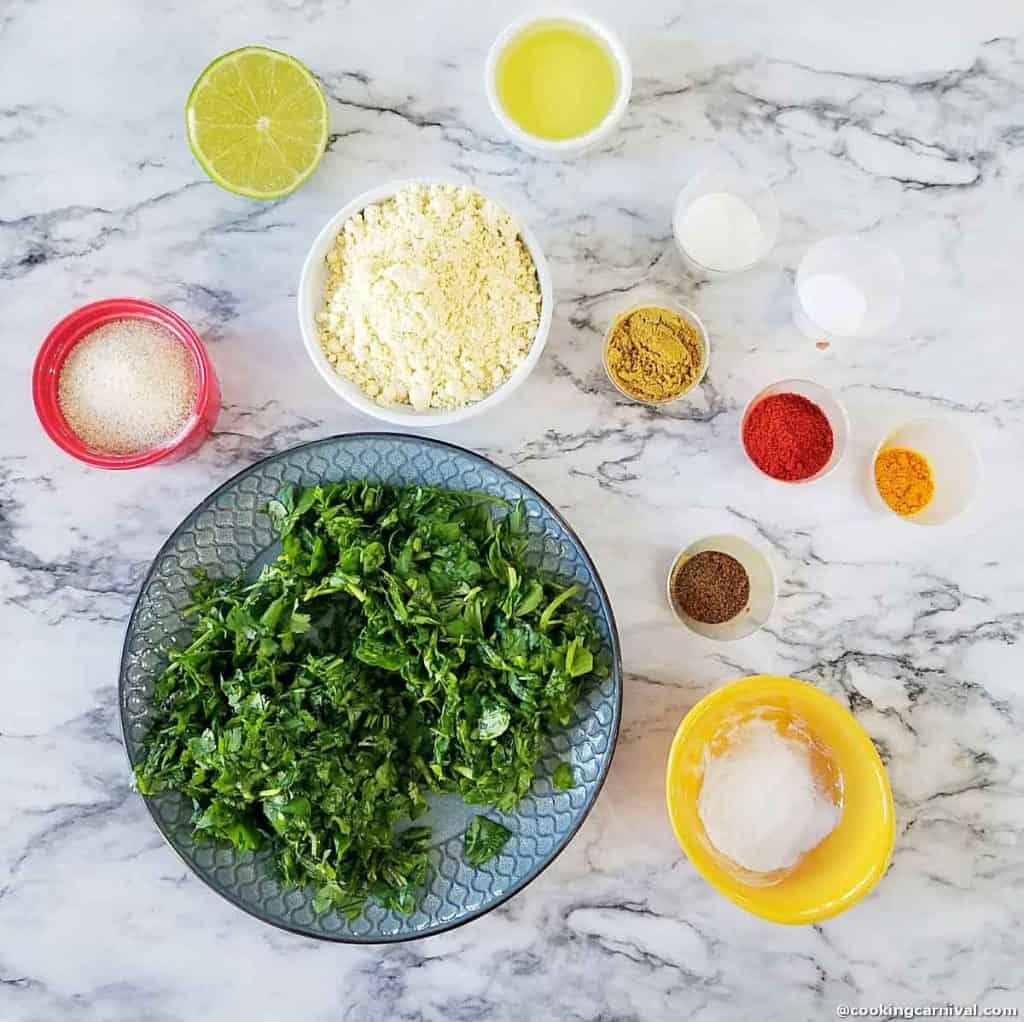
Other than that you will also need, oil for cooking undhiyu and frying the muthiyas, lots of cilantro for garnishing.
How to make Undhiyu? Step by step process
Step – 1 Make muthiya/dhokli (fenugreek dumplings)
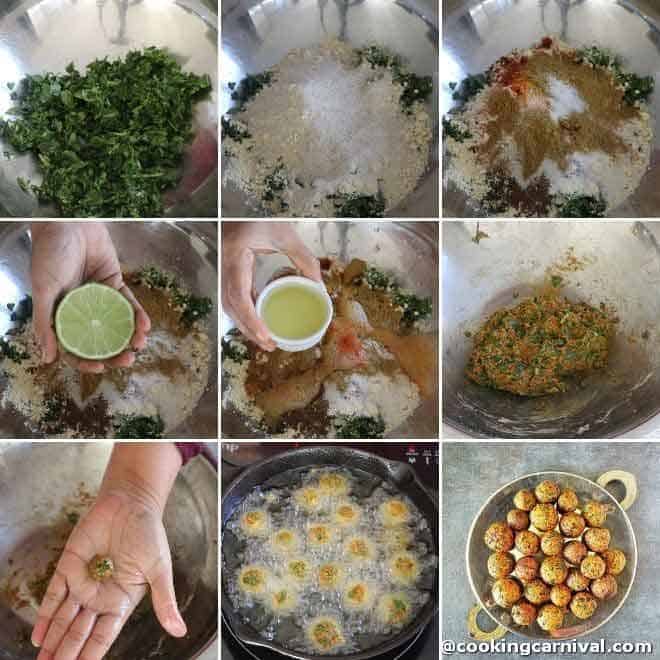
Clean methi leaves and cilantro, wash thoroughly in running clean water, and roughly chop them.
In a bowl combine all the muthia ingredients and knead into a dough-like you would do for chapatti. I didn’t add any water as my methi and cilantro had enough moisture in them. If your muthiya dough feels dry and you are not able to bind them easily, add 1 to 2 teaspoon water.
Apply some oil oh hands and divide into small marble size portions and make round balls. From the dough, I could make around 20 balls. Quantity will depend on the size of the muthiya.
Heat oil in a Kadai and deep fry on medium heat. You can do this in an appe pan or in an air fryer too to make them a bit healthier.
Take them out on a plate lined with absorbent paper. Leave it aside for later use.
Step – 2 Make Masala
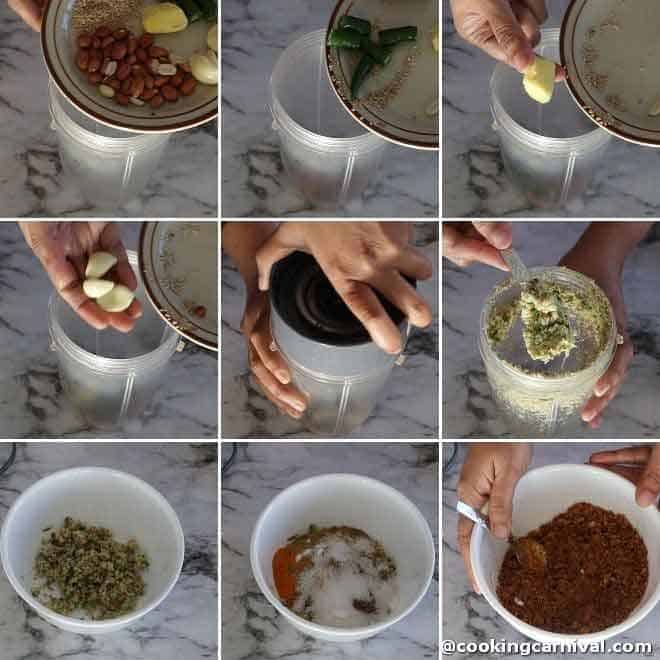
In a mixer grinder or food processor, take peanuts, sesame seeds, garlic, ginger, and green chilies. Coarsely crush them.
Now take a big bowl add the spices including crushed peanut mixture.
Mix them well and keep them aside.
Step – 3 Cooking Undhiyu
On the stovetop
Take out all the frozen vegetables an hour before cooking.
Cut Eggplant, cauliflower, potatoes, and sweet potatoes into big cubes.
Heat oil in a pan. Add all the frozen vegetables (Tuver, drumsticks, green peas, surti papdi, and Val papdi) and add 2 cups of water. Cover it with a glass lid or a plate.
Let it cook for 5 minutes over medium to high heat.
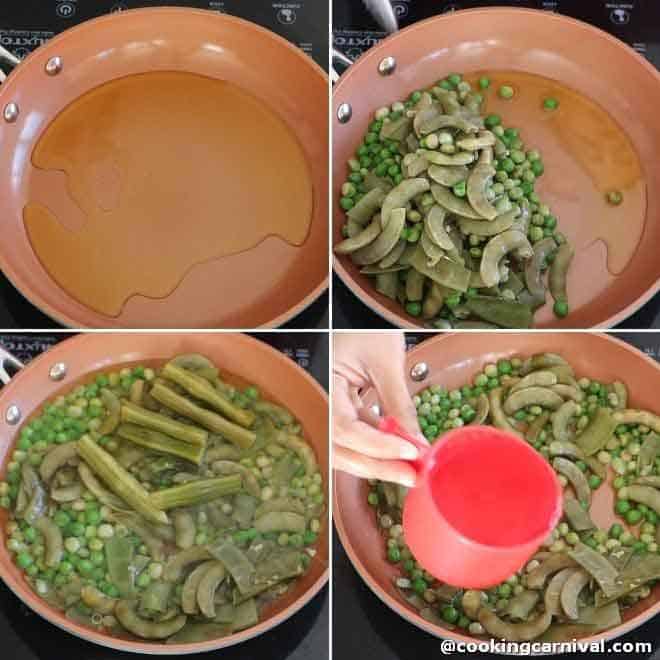
Now add regular potatoes, cover the pot and let them cook for 5 to 6 minutes over medium to high heat.
Open the lid and now add eggplant, sweet potatoes, cauliflower, and 2 cups of water. Cover it again and let them cook for 10 more minutes or until all the vegetables (frozen and fresh) are tender.
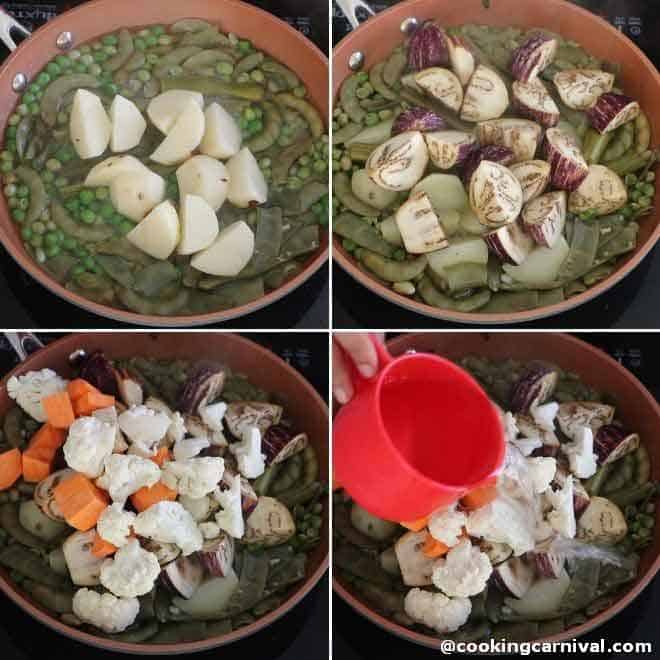
Open the lid, add prepared masala, tomato, and muthias. Mix everything well.
Add 1 cup of water (If required), cover the pot, and let everything cook for 5 minutes on medium heat. Stir in between.
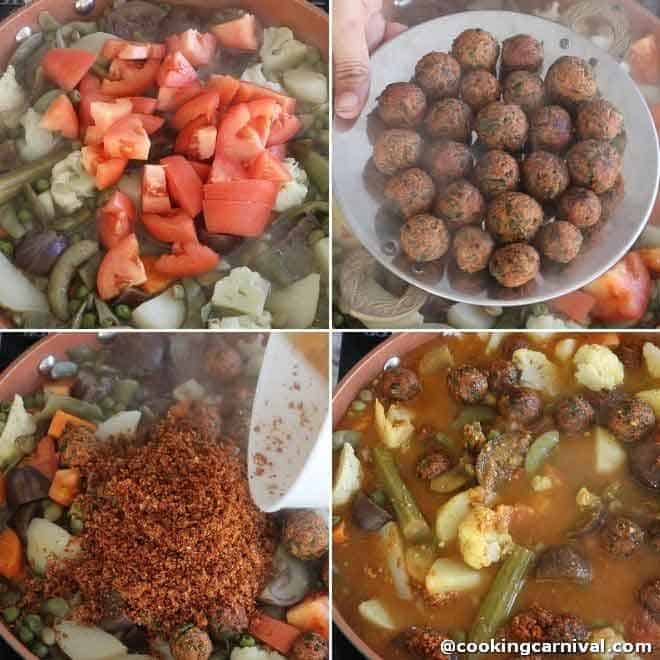
Open the lid and check the consistency.
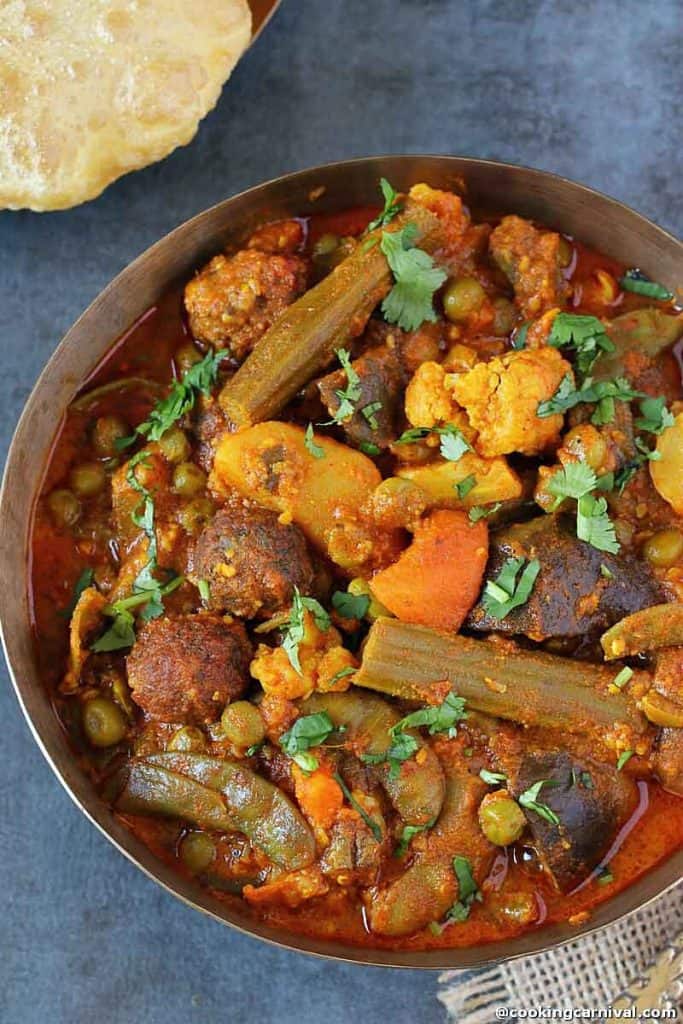
Switch off the flame and garnish it with cilantro.
Please note, cooking time may vary a bit if you are using fresh vegetables.
Making Undhiyu in Instant Pot (Pressure cooker)
Turn on the saute mode of your instant pot. Heat oil.
Now add all the vegetables (Fresh+frozen) one by one. Give a quick stir.
Add tomatoes, prepared masala, Methi muthya, and 2 cups of water. Don’t stir.
Cover the instant pot with its locking lid, vent valve on sealing position.
Turn off the instant pot from sauteing mode. Press the manual/pressure button and set the timer for 3 minutes under high pressure.
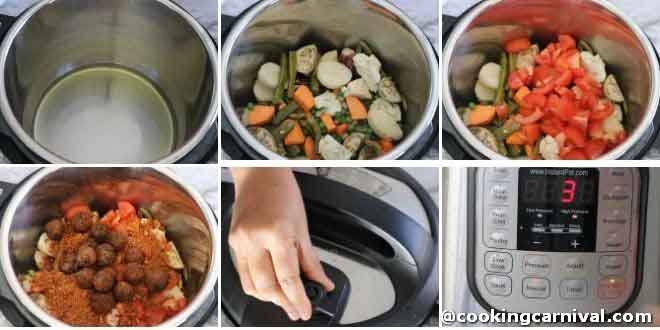
Once the cooking time is done, let the pressure release naturally for 10 minutes, and quickly release the remaining pressure.
Open the instant pot, gently stir the undhiyu and add lots of cilantro.
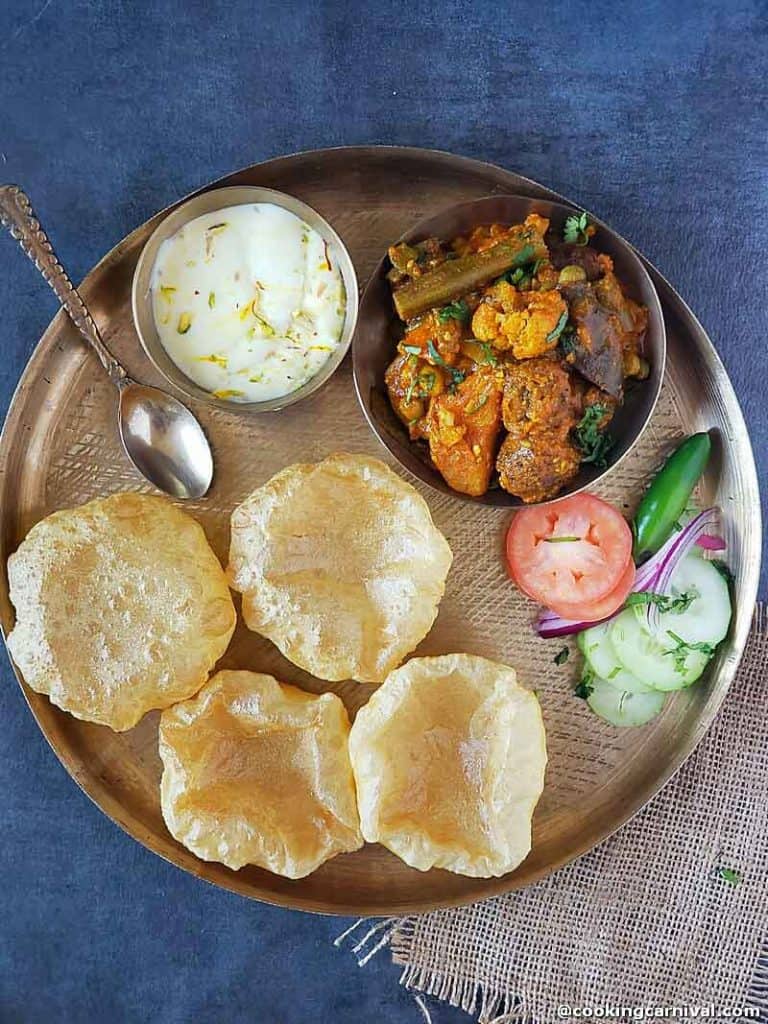
Serve it with Shrikhand and puri.
Notes, Pro-tips and FAQs
- If you don’t mind little extra calories and want the best taste, fry all the vegetables one by one, add the prepared masala-dumpling, and mix well. It tastes great.
- Please cut the vegetables into big cubes. Or else it will be mushy.
- Don’t compromise on oil for the best taste.
- Use all the ingredients as fresh as possible.
- (Don’t Judge me here) but use the same oil for cooking the undhyu in which you had fried the methi muthia, to develop extra flavors in the dish.
- If possible use a glass lid so you can see what’s going on inside the pan without removing the lid, as it is necessary to let the steam stay inside while cooking.
Can I skip making the fenugreek dumplings/ Methi muthiya?
Muthiya is the heart of this authentic Indian curry. But skip it if desired. You may just make shortcut undhiyu recipes like mixed vegetable curry.
Is Undhiyu Gluten-free?
The muthiyas are not gluten-free as it has sooji/rawa in it. Skip rawa if you are on a gluten-free diet. Instead, you can use rice flour.
To make Jain Undhiyu
Substitute the root vegetables like potato and sweet potatoes with a mix of raw banana and bottle gourd ( doodhi/ lauki )
Skip the ginger and garlic too.
Serving suggestions
Undhiyu is served with Pooris and a side of Srikhand on a festival like Uttarayan and special occasions.
My husband loves it with Bajra rotla or Bhakhari.
Freezing and storing instructions
This dish stays good for up to 5 days in the refrigerator and freezes well in the freezer. Place it in an airtight freezer-safe container and freeze up to 2 months.
Thaw overnight in the fridge or over the counter. Once thawed heat it in the microwave or pan. Please DO NOT refreeze.
It is a great make ahead of time dish for large group parties & potluck.
More Gujarati recipes
Have you tried this Recipe? Please feed us with your feedback, ★ star ratings, and comments below.
You can also FOLLOW me on FACEBOOK, INSTAGRAM, and PINTEREST for more fabulous recipes and updates.
Subscribe to our YouTube Channel for tasty and easy video recipes.
Undhiyu Recipe (Stove-top and Instant Pot)
Ingredients
Methi Muthiya/Dhokli
- ½ cup – Methi leaves chopped
- ½ cup – Cilantro chopped
- ½ cup – Besan/gram flour
- 2 tablespoon – Sooji also known as semolina or Rawa
- ½ tablespoon – red chili powder
- ½ teaspoon – cumin powder
- 1 teaspoon – coriander powder
- ¼ teaspoon – turmeric powder
- ½ tablespoon – sugar
- ½ teaspoon – garam masala
- ⅛ teaspoon – baking soda
- ½ tablespoon – lemon juice
- salt to taste
For masala
- 1 tablespoon – peanut
- 1 tablespoon – sesame seeds
- 1 tablespoon – green chilies mild variety
- 1 inch – ginger
- 1 tablespoon – garlic
- salt to taste
- 1 teaspoon – cumin powder
- 2 teaspoon – coriander powder
- ½ teaspoon – turmeric powder
- 1 teaspoon – garam masala
- 1 tablespoon – red chili powder
For vegetables
- ½ cup – val papdi used frozen
- ½ cup – Tuvar lilva used frozen
- ½ cup – surti papadi used frozen
- 5 pieces – drumstick used frozen
- ½ cup – green peas used frozen
- 175 gram – Eggplant 4 small sizes, cut into big pieces
- 200 gram potatoes 3 small sizes, cut into big pieces
- ¾ cup – cauliflower cut into big pieces
- ½ cup – Sweet potatoes (cut into big pieces
- 1 cup – Chopped tomatoes
- 5 tablespoon – cooking oil
- 1 teaspoon – lemon juice
Other ingredients
- Oil for frying muthiyas
- Cilantro for garnishing
Instructions
Step – 1 Make muthiya/dhokli (fenugreek dumplings)
- Clean methi leaves and cilantro, wash thoroughly in running clean water and roughly chop them.
- In a bowl combine all the muthia ingredients with cilantro-methi leaves and knead into a dough-like you would do for chapatti. I didn’t add any water as my methi and cilantro had enough moisture in them. If your muthiya dough feels dry and you are not able to bind them easily, add 1 to 2 teaspoon water.
- Divide into the small marble size portions and make round balls. From the dough, I could make around 20 balls. Quantity will depend on the size of the muthiya.
- Heat oil in a Kadai and deep fry on medium heat. You can do this in an appe pan or in an air fryer too to make them a bit healthier.
- Take them out on a plate lined with absorbent paper. Leave it aside for later use.
Step – 2 Make Masala
- In a mixer grinder or food processor, take peanuts, sesame seeds, garlic, ginger, and green chilies. Coarsely crush them.
- Now take a big bowl add the spices including crushed peanut mixture.
- Mix them well and keep them aside.
Step – 3 Cooking Undhiyu
On the stovetop
- Take out all the frozen vegetables an hour before cooking.
- Cut Eggplant, cauliflower, potatoes, and sweet potatoes into big cubes.
- Heat oil in a pan. Add all the frozen vegetables (Tuver, drumsticks, green peas, surti papdi, and Val papdi) and add 2 cups of water. Cover it with a glass lid or a plate.
- Let it cook for 5 minutes over medium to high heat.
- Now add regular potatoes, cover the pot and let them cook for 5 to 6 minutes over medium to high heat.
- Open the lid and now add eggplant, sweet potatoes, cauliflower, and 2 cups of water. Cover it again and let them cook for 10 more minutes or until all the vegetables (frozen and fresh) are tender.
- Open the lid, add prepared masala, tomato, and muthias. Mix everything well.
- Add 1 cup of water (If required), cover the pot, and let everything cook for 5 minutes on medium heat. Stir in between.
- Open the lid and check the consistency.
- Switch off the flame and garnish it with cilantro.
- Please note, cooking time may vary a bit if you are using fresh vegetables.
- Serve it with poori, roti, paratha, or plain rice.
Making Undhiyu in Instant Pot (Pressure cooker)
- Turn on the saute mode of your instant pot. Heat oil.
- Now add all the vegetables (Fresh+frozen) one by one. Give a quick stir.
- Add tomatoes, prepared masala, Methi muthya, and 2 cups of water. Don’t stir.
- Cover the instant pot with its locking lid, vent valve on sealing position.
- Turn off the instant pot from sauteing mode. Press the manual/pressure button and set the timer for 3 minutes under high pressure.
- Once the cooking time is done, let the pressure release naturally for 10 minutes, and quickly release the remaining pressure.
- Open the instant pot, gently stir the undhiyu and add lots of cilantro.
- Serve it with poori, roti, paratha or pain rice.
Video
Notes
- If you don’t mind little extra calories and want the best taste, fry all the vegetables one by one, add the prepared masala-dumpling, and mix well. It tastes great.
- Please cut the vegetables into big cubes. Or else it will be mushy.
- Don’t compromise on oil for the best taste.
- Use all the ingredients as fresh as possible.
- (Don’t Judge me here) but use the same oil for cooking the undhyu in which you had fried the methi muthia, to develop extra flavors in the dish.
- If possible use a glass lid so you can see what’s going on inside the pan without removing the lid, as it is necessary to let the steam stay inside while cooking.
Can I skip making the fenugreek dumplings/ Methi muthiya?
Muthiya is the heart of this authentic Indian curry. But skip it if desired. You may just make shortcut undhiyu recipes like mixed vegetable curry.Is Undhiyu Gluten-free?
The muthiyas are not gluten-free as it has sooji/rawa in it. Skip rawa if you are on a gluten-free diet. Instead, you can use rice flour.To make Jain Undhiyu
Substitute the root vegetables like potato and sweet potatoes with a mix of raw banana and bottle gourd ( doodhi/ lauki ) Skip the ginger and garlic too.Serving suggestions
Undhiyu is served with Pooris and a side of Srikhand on a festival like Uttarayan and special occasions. My husband loves it with Bajra rotla or Bhakhari.Freezing and storing instructions
This dish stays good for up to 5 days in the refrigerator and freezes well in the freezer. Place it in an airtight freezer-safe container and freeze up to 2 months. Thaw overnight in the fridge or over the counter. Once thawed heat it in the microwave or pan. Please DO NOT refreeze. It is a great make ahead of time dish for large group parties & potluck. The post is republished with new images, video, and content, originally published in October 2014.Nutrition
Warm regards,
Dhwani.






Nice and Tasty looks , We will try this .
Thanks for sharing .
Thanks Amrita….Try it and Let me know how it goes…