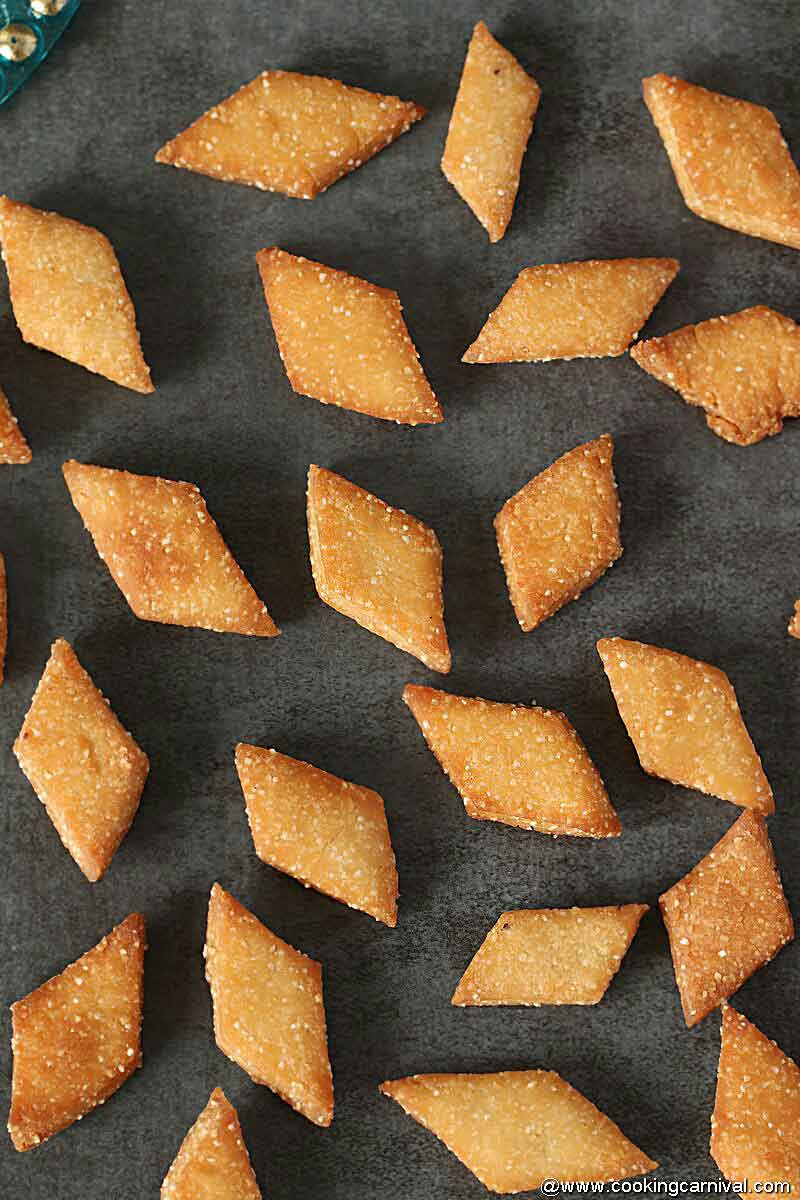
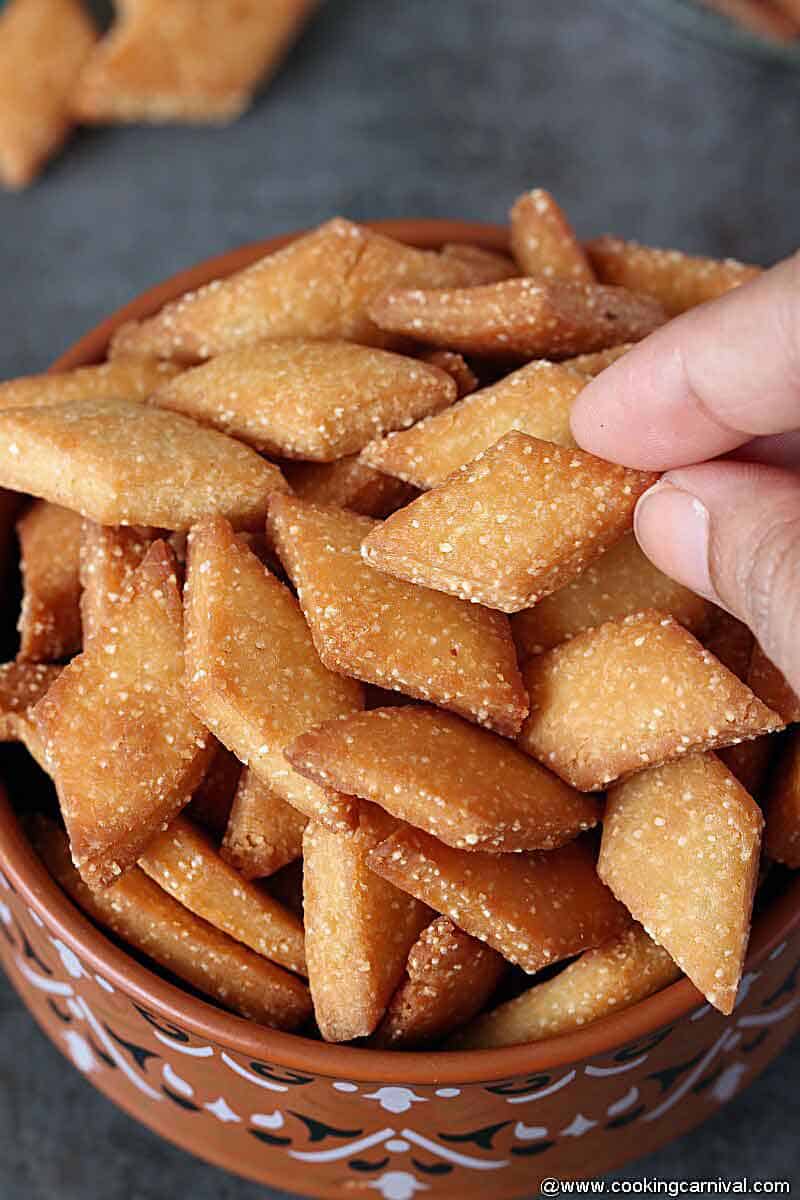
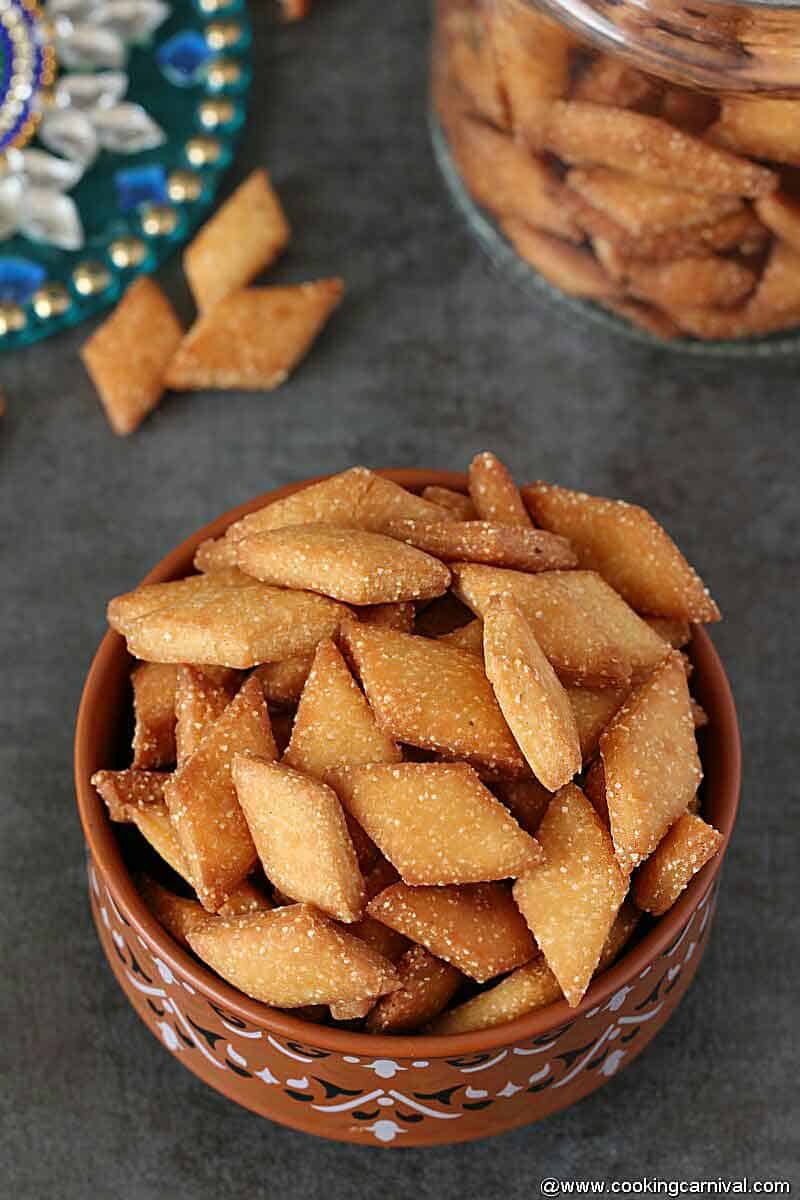
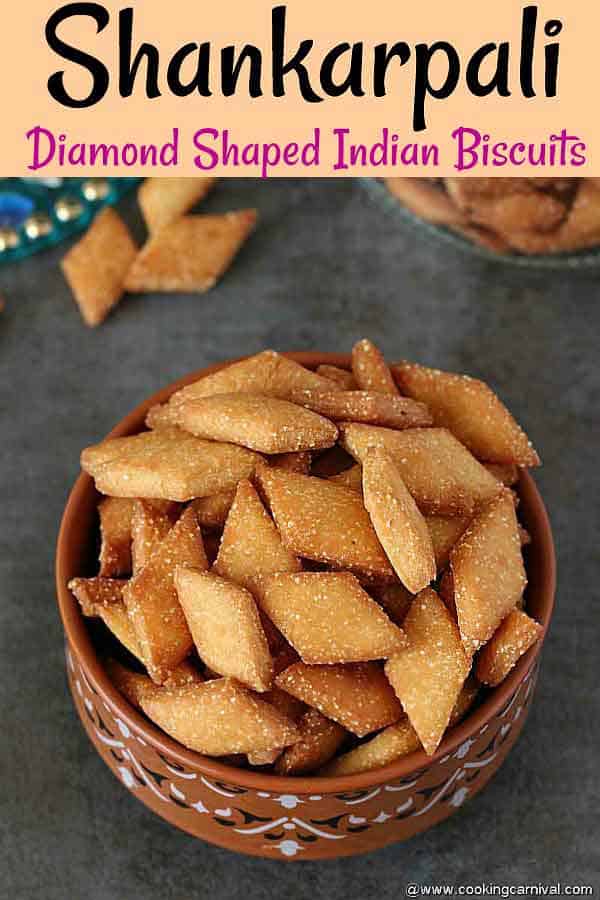
Shankarpali also called shakarpara is a deep-fried, sweet, and diamond-shaped crispy biscuits made with All-Purpose flour, ghee, Semolina sugar, and milk. These are a perfect bite-sized snack for kids and are quite addictive.

Jump to:
With Diwali around the corner, I am sure everybody must be busy in searching for snacks and sweets recipe to make.
Two weeks back, I have shared Gujia, Chakli and Mawa recipes. And today, I am sharing the most addictive snack recipe – Shakarpara.
This snack is not only prepared on special occasions like Diwali and Holi, but these can be prepared any time of the year.
This can be prepared either as savory or sweet. Today, I am sharing the recipe of the sweet version.

Shankarpali is made in Maharashtra, South India, and Gujarat. Every Indian home has its own version of the sweet Shankarpali recipe.
This recipe of shakarpara is my go-to recipe because it is super easy to make.
They are amazing, Not too sweet, crunchy and they literally melt in your mouth.
This Shakkar Pare is great tea time snack too, has a good shelf life and best snack to carry for traveling.
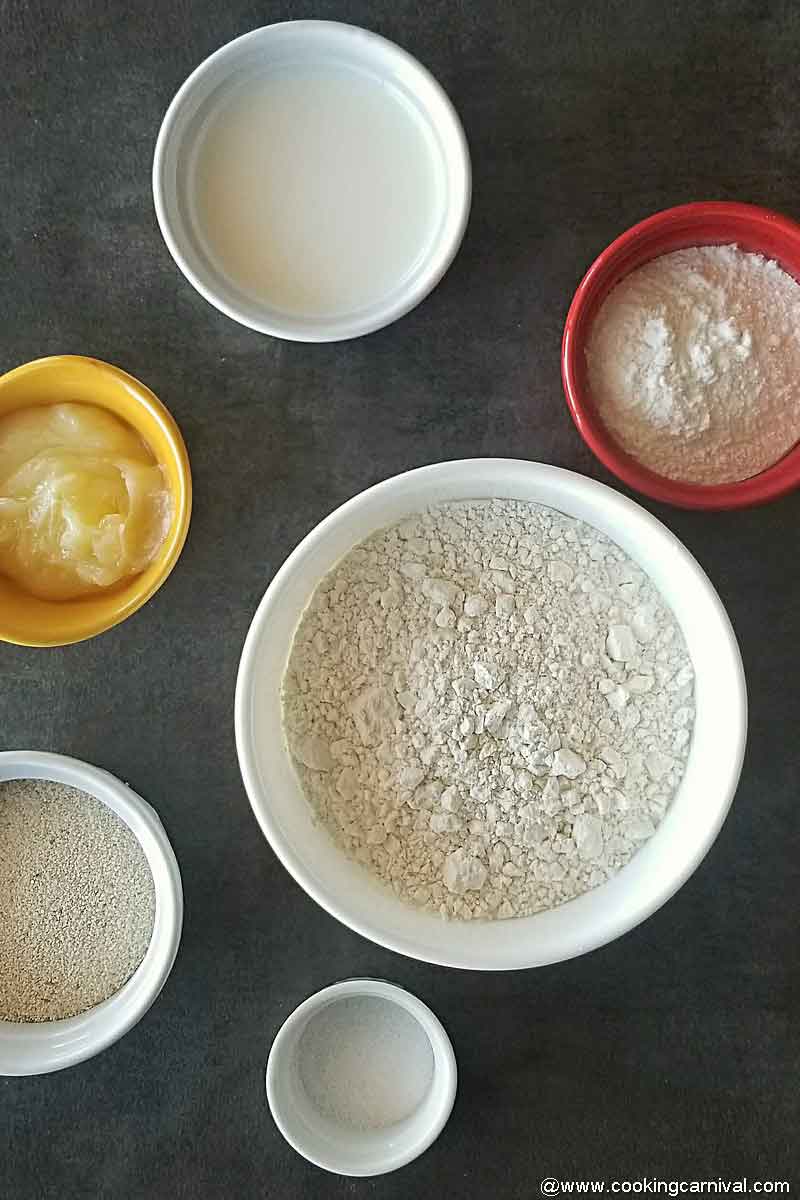
Shankarpali Ingredients –
This can be made with only a handful of pantry ingredients.
- All-Purpose flour / Maida
- Sooji/Semolina, Fine variety
- Ghee
- Milk
- Sugar
- Salt
- Oil for frying
STEP BY STEP MAKING OF SHAKARPARA / SHANKARPALI RECIPE –
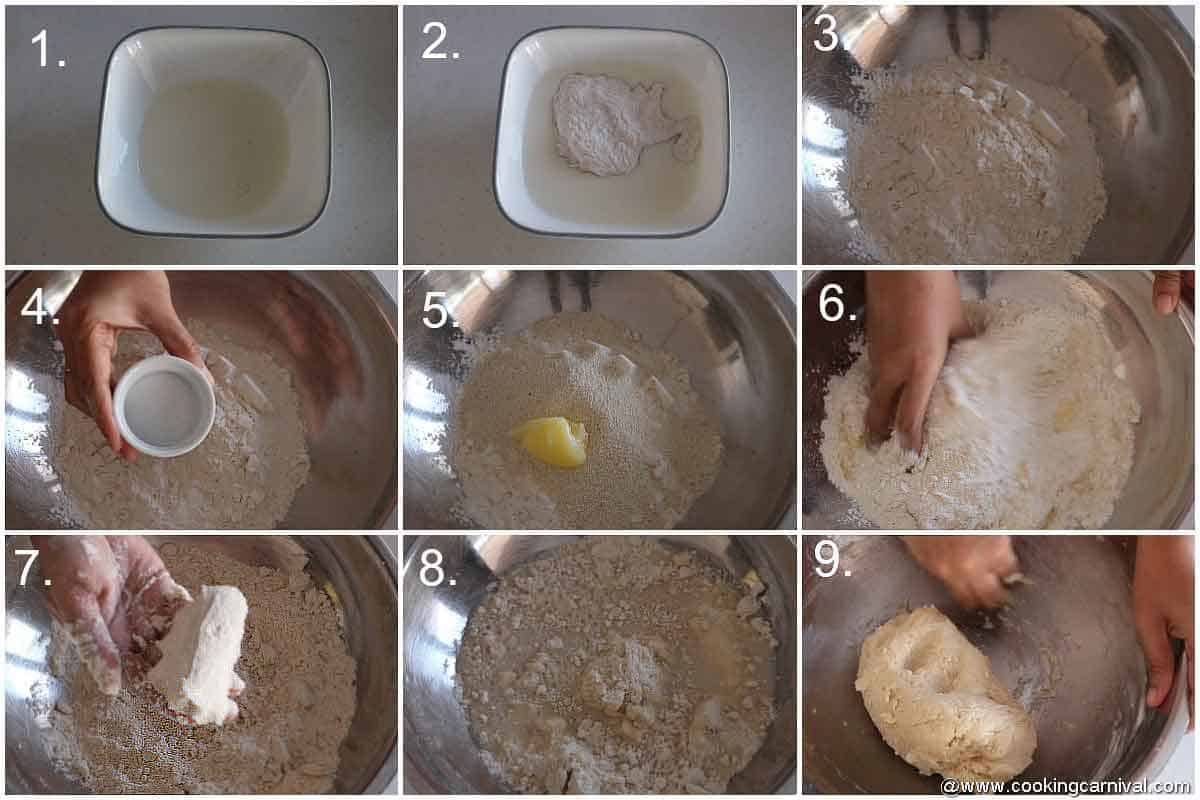
Take Milk and sugar in a bowl. Mix until sugar dissolves completely. Keep it aside. (photo 1 and 2)
In a big mixing bowl, take flour, semolina, salt, and ghee. (Photo 3 to 5)
Mix everything well until it resembles breadcrumbs. If you hold a portion of the mixture with your fist, it should hold its shape. if not, add another 1 tablespoon of ghee. (Photo 6 and 7)
Now add milk-sugar mixture little by little to knead a soft dough. Keep the dough very soft, don’t knead the tight dough as the semolina will absorb water and make it firmer later. (Photo 8 and 9)
Cover the dough with a damp cloth and leave it aside for 30 minutes.
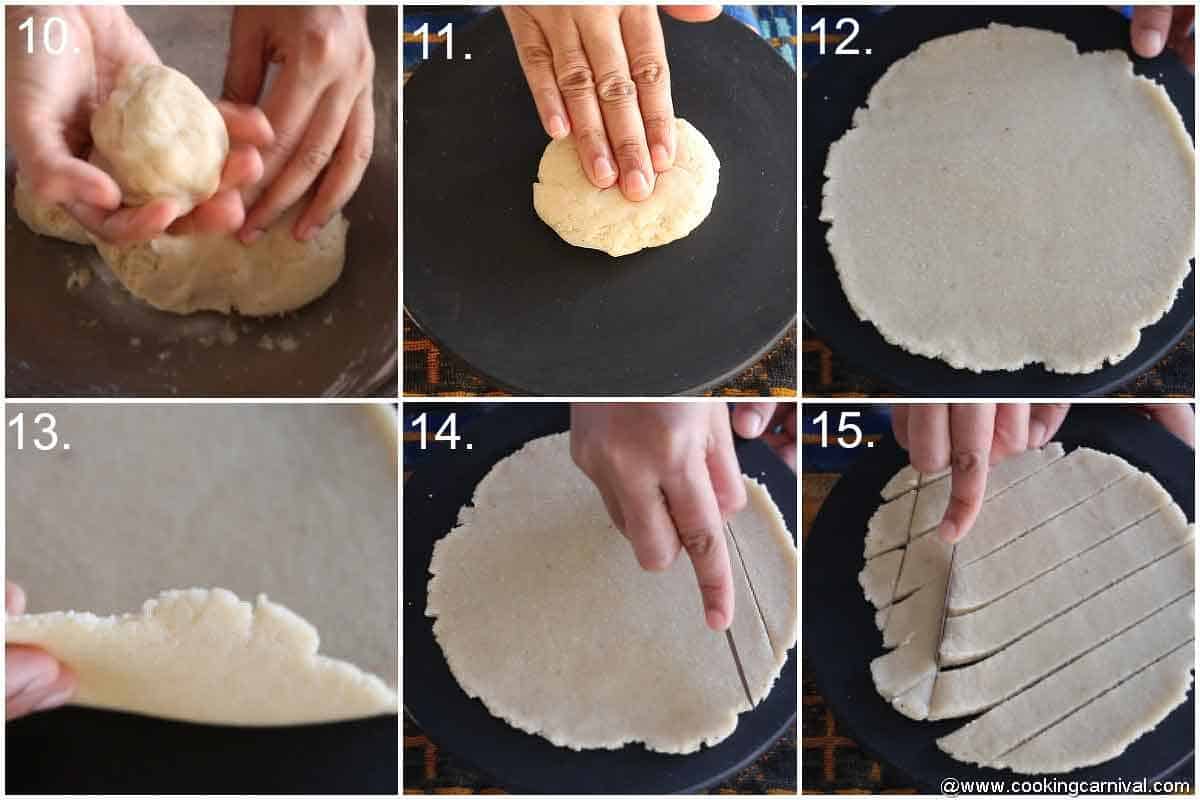
After 30 minutes, divide the dough into 7 equal balls. (Photo 10)
Take a ball and roll out into a big circle, little thicker than a roti. (Photo 11 to 13)
Cut straight lines and then diagonal lines to get a diamond shape. You can even do square shape shakarpara too. (Photo 14 and 15)
For Frying –
(Photo 15 and 16)
In the meantime Heat up oil over medium heat in a pan.
Slowly drop in the cut shakarpara in the hot oil.
Fry them in small batches on a medium to low heat, moving the shankapalis with the slotted spoon in every now and then, until golden brown on both sides. Do not let them brown too much, as they will continue cooking in the residual heat and become darker.
Remove them to a tray lined with an absorbent paper. Fry all the pieces in the same way, in small batches.
Baking option –
(Photo 17 and 18)
Preheat oven to 375 deg F. Line a baking tray with the shakarpara. Do not overlap them. Cook for 10 minutes or until the edges start to brown.

Once cool completely, store them in an airtight container. It will stay good up to 3 weeks.
Enjoy!!
Notes and Pro-tips
- Make sure sugar is completely melted in milk before adding it into the dough.
- If you want to make healthy shankarpali, replace all-purpose flour with whole wheat flour and sugar with jaggery.
- Always fry them on a medium to low flame.
- Adjust the sweetness according to your preference.
- If you want to make it dairy-free, use almond milk or water instead of regular milk and oil instead of ghee.
- This can be stored at room temperature up to 3 weeks in an airtight container.
- Always add milk little by a little while kneading the dough as a liquid to flour ratio depends on many factors.
- Do not knead a tight dough as the semolina will absorb water and it makes firmer.
- Resting the dough is a very important step. Resting the dough will help to develop the gluten.
- Use fine variety of sooji. I used coarse variety by mistake. You should notice in the pictures. 🙂
- You can bake Shankarpali too. Preheat oven to 375 deg F. Line a baking tray with the shakarpara. Do not overlap them. Cook for 10 minutes or until the edges start to brown.
More Snacks recipe for Diwali –
Have you tried this Recipe? Please feed us with your feedback, ★ star ratings, and comments below.
You can also FOLLOW me on FACEBOOK, INSTAGRAM, and PINTEREST for more fabulous recipes and updates.
Subscribe to our YouTube Channel for tasty and easy video recipes.
Shankarpali | Shakarpara recipe
Ingredients
- 2 cups – All-Purpose flour / Maida
- ½ cup – Sooji/Semolina Fine variety
- 3.5 tablespoon – Ghee
- ¾ cup – Milk
- ¾ cup – Sugar
- ¼ teaspoon – Salt
- Oil for frying
Instructions
- Take Milk and sugar in a bowl. Mix until sugar dissolves completely. Keep it aside.
- In a big mixing bowl, take flour, semolina, salt, and ghee.
- Mix everything well until it resembles breadcrumbs. If you hold a portion of the mixture with your fist, it should hold its shape. if not, add another 1 tablespoon of ghee.
- Now add milk-sugar mixture little by little to knead a soft dough. Keep the dough very soft, don’t knead the tight dough as the semolina will absorb water and make it firmer later.
- Cover the dough with a damp cloth and leave it aside for 30 minutes.
- After 30 minutes, divide the dough into 7 equal balls.
- Take a ball and roll out into a big circle, little thicker than a roti.
- Cut straight lines and then diagonal lines to get a diamond shape. You can even do square shape shakarpara too.
- For Frying –
- In the meantime Heat up oil over medium heat in a pan.
- Slowly drop in the cut shakarpara in the hot oil.
- Fry them in small batches on a medium to low heat, moving the shankapalis with the slotted spoon in every now and then, until golden brown on both sides. Do not let them brown too much, as they will continue cooking in the residual heat and become darker.
- Remove them to a tray lined with an absorbent paper. Fry all the pieces in the same way, in small batches.
- Baking option –
- Preheat oven to 375 deg F. Line a baking tray with the shakarpara. Do not overlap them. Cook for 10 minutes or until the edges start to brown.
- Once cool completely, store them in an airtight container. It will stay good up to 3 weeks.
- Enjoy!!
Video
Notes
- Make sure sugar is completely melted in milk before adding it into the dough.
If you want to make healthy shankarpali, replace all-purpose flour with whole wheat flour and sugar with jaggery. - Always fry them on a medium to low flame.
- Adjust the sweetness according to your preference.
- If you want to make it dairy-free, use almond milk or water instead of regular milk and oil instead of ghee.
- This can be stored at room temperature up to 3 weeks in an airtight container.
- Always add milk little by a little while kneading the dough as a liquid to flour ratio depends on many factors.
- Do not knead a tight dough as the semolina will absorb water and it makes firmer.
- Resting the dough is a very important step. Resting the dough will help to develop the gluten.
- Use fine variety of sooji. I used coarse variety by mistake. You should notice in the pictures. 🙂
- You can bake Shankarpali too. Preheat oven to 375 deg F. Line a baking tray with the shakarpara. Do not overlap them. Cook for 10 minutes or until the edges start to brown.
Nutrition
Warm Regards,
Dhwani.





Leave a Reply