This No-Knead Cranberry Walnut Bread is the ultimate fresh-baked holiday loaf and a perfect breakfast with a slathering of creamy butter. It’s freezer-friendly and vegan!
This no-knead bread is packed with dried cranberries and crunchy walnuts and is also scented with orange zest. In short, it is a flavor combo that shines through in every slice and is perfect holiday bread.
In this post, I will show you how to make this No-knead bread with step by step process and will also show you how to proof the dough in Instant Pot.

Jump to:
Baking bread at home may seem intimidating, especially artisan bread. But no-knead bread is one of the easiest bread to bake at home. Like its name says, there’s no kneading required!
The crust of no-knead bread is beautiful and it has that amazing chewy texture. It takes very little effort to make this bread. All you need is patience while you wait for the dough to do its magic in 18 hours!
To make no-knead bread, you will need 5 basic ingredients, bread flour, yeast, water, salt, and oil. That’s it!
The beautiful thing about such a bread recipe is you can add any toppings of your choice.
So our today’s no-knead bread is filled with delicious cranberries and walnuts, with a hint of orange. So delicious!
And if you are a lover of Costco’s or Whole Foods Cranberry Walnut bread like me, now you can make a copycat version for so MUCH CHEAPER.
You’ll love baking this easy loaf of cranberry walnut bread just in time for the holidays.
I always prep the dough the night before and bake it the following day. It’s so effortless when it comes to baking bread.
Your bread will turn out so beautiful and there’s nothing quite like enjoying warm homemade bread straight from the oven.
Why will you make this bread?
- It’s very easy to make and is prep-ahead friendly.
- It gives us all the festive feels!
- Perfect gift for your family, friends, or neighbor.
- It is soft, crusty, and chewy, slightly sweet, and compliments cool weather and holiday festivities.
- No kneading is required.
- It’s tasty, hearty bread that is perfect for sandwiches and it also makes fabulous toast when slathered with butter.
You will love this beautiful crusty cranberry walnut bread.
This recipe was inspired by our Instant Pot bread that so many readers have enjoyed! We hope you love this bread just as much.

What if I want to bake this bread the same day and don’t want to wait for 18 hours?
As I said above, no-knead bread takes a long time to rise, around 18 hours. That’s the hardest part when you don’t have enough time.
But thanks to Instant Pot. It changed my life. The method of proofing the bread dough in Instant Pot is a lot easier and a lot faster.
Proofing the Bread in Instant Pot is the perfect solution for baking No-Knead bread in winters. Now, you can enjoy homemade crusty bread very often without waiting too long.
With the help of Instant Pot, the bread dough will rise in just 4 hours. You don’t need to wait for 18 to 24 hours. Win… Win…!!
But to be able to proof the bread dough in an Instant pot, your Instant Pot must have a yogurt function.
It provides the ideal temperature required for the bread dough to rise. Without yogurt function, you can not proof the dough in the instant pot.
Ingredients required
- Yeast: instant yeast or dry active both work in this recipe. I have used Instant yeast. Below I have explained how to make this bread using active dry yeast. Make sure it’s fresh and active!
- Flour: I used bread flour, but you can use all-purpose flour too.
- Sugar: To feed the yeast.
- Olive oil: I like the deeper olive oil flavor so I have used Extra virgin Olive Oil in the bread.
- Cranberries: I recommend unsweetened dried cranberries.
- Walnuts: You can swap for pecans too!
- Salt: regular or kosher works well in this recipe.
- Water: Use water between 115 to 120 degrees F when pouring into the yeast mixture into dry ingredients.
- Orange zest: For the citrusy flavors.

Step by step process
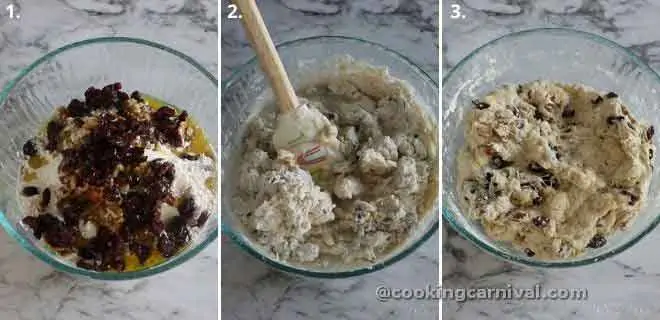
- Take flour, Instant yeast, sugar, oil, cranberries, walnut, orange zest, and salt in a big bowl. Mix well. Add lukewarm water a little at a time. (Note – You may not require all the yeast water, depending on the quality of the flour. So I highly recommend, add water slowly).
- Give it a quick stir until all the ingredients are incorporated. The dough should be rough, shaggy, and sticky.
Proofing dough on the countertop
- Grease the big mixing bowl with oil and place the dough in it. Cover the bowl and let the dough be proof for 18 to 24 hours at room temperature.
Proofing dough in Instant Pot
- Grease the inner pot of the instant pot with oil and, place the dough in the pot, cover the instant pot with a glass lid or plate and press the yogurt button on the Normal Setting. Set the time for 4 Hours.
- Once the dough is proofed, you will notice the dough is dotted with bubbles and has risen more than double in size.

Second proofing
- Scatter some flour on a piece of parchment paper, remove the dough from an instant pot (or from the bowl). Now take the dough onto the floured Parchment paper.
- Shape the dough on parchment paper into a tight ball. (as shown in the video below).
- Note – Shaping the dough into a round tight loaf on parchment paper makes it easier to place the bread in the Dutch oven and take out the bread from the Dutch Oven.
- Cover the dough with a towel for about 30 minutes.
- Meanwhile, preheat your oven to 450 degrees F. and place the Dutch oven (with lid) inside so it gets hot.
Baking
- Take a sharp knife and slash the bread 2 to 3 times, cutting about ½ inch deep. You can skip this step as well. Sprinkle a light coating of flour over the top.
- Now carefully remove the hot Dutch oven from the oven. Remove the lid and gently put the dough ball into the Dutch oven.

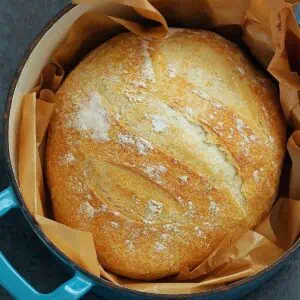
- Put the lid on and pop it in the oven and bake it at 450 degrees F for 30 minutes. After that remove the lid and bake it 10 to 15 minutes more without lid @450 degrees F, on the middle rack. (30 minutes lid on and 10 to 15 minutes without the lid, total 40 to 45 minutes).
- Remove the loaf and let it cool on a rack before slicing. Enjoy with butter , use it in making your choice of sandwich or dip it in this dipping oil.

Tips, Notes and quick FAQs
- Use bread flour for the best result.
- Check the expiration of Active dry yeast.
- Check the water temperature before adding the yeast. The perfect water temperature is 110 to 115.
- Keep in mind that the exact rise time for the dough can vary slightly based on the temperature and humidity in your house. Ideally, you want to find a nice warm spot for the dough to rise.
- If you don’t like the cranberry walnut combo, you can use other mix-ins or even leave plain.
- Flour-water ratio – Depending on how you measure the flour, quality of flour, and how dry the weather is, you may need to add/less water to bring the dough the right wet and sticky consistency. If your dough is dry after you mix it, add water by the tablespoon until it feels perfect.
- You can use Half All-Purpose Flour and Half Whole Wheat flour too instead of only all-purpose flour.
- Make the wet shaggy dough.
- Scoring the bread dough is optional, but it does help the bread expand, giving it more height, and adds a pretty, decorative touch to the top of the loaf.
- If you don’t have a Dutch oven you can bake the bread on a baking sheet or a pizza stone. It won’t rise quite as high but it will work.
- Every oven is different: keep this in mind when baking bread. Some ovens can get much hotter than others and cause the bake to happen much faster. Check on the color of your bread in the last 15 minutes – pull when it’s golden brown on top.
Keep leftovers fresh by storing them in a ziplock bag in the refrigerator and heat in the oven or toast when ready to enjoy. It will stay up to a week in the fridge.
This bread freezes beautifully. Let the bread cool completely, then wrap in plastic wrap and place in large freezer-safe bags. You can also slice the bread and then freeze it. It will stay good for up to 2 months.
Remove, thaw, and reheat at 350 until warm in the oven.
This bread is beautifully served alongside any hearty meal, for soup dipping or with this yummy dipping oil. We also love toasting it and spreading it with compound butter.
Swap out dried cranberries with dried raisins, blueberries, cherries, apples, dates, or any dried fruit.
Swap out walnuts with cashew, peanut, pecans, pistachios, almonds, hazelnuts, or even sunflower seeds
Sure you can but it will be more tart, but still so yummy.
Yes, Feel free to omit the nuts altogether, and make plain bread.
Yeah, you can make this no-knead bread with gluten-free flour.
You’ll need to take different steps when baking bread with different yeasts.
Instant yeast: If you are using instant yeast like I did today, you can skip dissolving it in water and stir it into your dry ingredients before adding water.
Active dry yeast: If you have active dry yeast on hand, you will need to activate it in water before adding flour.
We hope you love this bread just as much as we do! The crust is so crispy, crunchy, with a beautiful chewy texture inside with little sweet and citrusy flavor.

More bread recipes that is perfect for Holiday menu
- No Knead Pesto Focaccia Bread
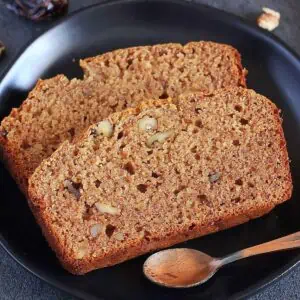
- No knead Pumpkin Bread (Instant Pot)
- Peperoncini Focaccia Bread
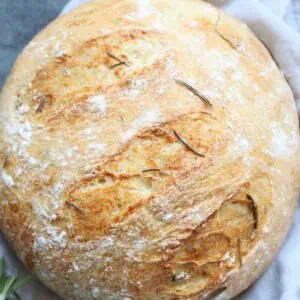
- Instant Pot Olive Oil Rosemary No Knead Bread
Have you tried this Recipe? Please feed us with your feedback, ★ star ratings, and comments below.
You can also FOLLOW me on FACEBOOK, INSTAGRAM, and PINTEREST for more fabulous recipes and updates.
Subscribe to our YouTube Channel for tasty and easy video recipes.
Cranberry Walnut Bread (no-knead instant pot bread)
Ingredients
- 3 cups – Bread Flour 425 grams
- 1 ¼ teaspoon – Instant Yeast
- 1 ¼ teaspoon – Salt
- 1 teaspoon – Sugar
- 1 ½ cup – Lukewarm water (300ml) You may need 1 – 2 tablespoons extra to get the perfect shaggy dough
- ¼ cup – Extra Virgin Olive oil
- ¾ cup – Walnuts
- ¾ cup – dried cranberries
- 1 teaspoon – Orange zest
Instructions
Make a dough
- Take flour, Instant yeast, sugar, oil, cranberries, walnut, orange zest, and salt in a big bowl. Mix well. Add lukewarm water a little at a time. (Note – You may not require all the yeast water, depending on the quality of the flour. So I highly recommend, add water slowly).
- Give it a quick stir until all the ingredients are incorporated.Note – The dough will be sticky, rough, and a bit shaggy, so don’t worry!
Proofing dough on the countertop
- Grease the big mixing bowl with oil and place the dough in it. Cover the bowl and let the dough be proof for 18 to 24 hours at room temperature.
Proofing dough in Instant Pot
- Grease the inner pot of the instant pot with oil and, place the dough in the pot, cover the instant pot with a glass lid or plate and press the yogurt button on the Normal Setting. Set the time for 4 Hours.
- Once the dough is proofed, you will notice the dough is dotted with bubbles and has risen more than double in size.
Second proofing
- Scatter some flour on a piece of parchment paper, remove the dough from an instant pot (or from the bowl). Now take the dough onto the floured Parchment paper.
- Shape the dough on parchment paper into a tight ball. (as shown in the video below).Note – Shaping the dough into a round tight loaf on parchment paper makes it easier to place the bread in the Dutch oven and take out the bread from the Dutch Oven.
- Cover the dough with a towel for about 30 minutes.
- Meanwhile, preheat your oven to 450 degrees F and place the Dutch oven (with lid) inside so it gets hot.
Baking
- Take a sharp knife and slash the bread 2 to 3 times, cutting about ½ inch deep. You can skip this step as well. Sprinkle a light coating of flour over the top.
- Now carefully remove the hot Dutch oven from the oven. Remove the lid and gently put the dough ball into the Dutch oven.
- Put the lid on and pop it in the oven and bake it at 450 degrees F for 30 minutes. After that remove the lid and bake it 10 to 15 minutes more without lid @450 degrees F, on the middle rack. (30 minutes lid on and 10 to 15 minutes without the lid, total 40 to 45 minutes).
- Remove the loaf and let it cool on a rack before slicing. Enjoy with butter or use it in making your choice of sandwich.
Video
Notes
- Use bread flour for the best result.
- Check the expiration of Active dry yeast.
- Check the water temperature before adding the yeast. The perfect water temperature is 110 to 115.
- Keep in mind that the exact rise time for the dough can vary slightly based on the temperature and humidity in your house. Ideally, you want to find a nice warm spot for the dough to rise.
- If you don’t like the cranberry walnut combo, you can use other mix-ins or even leave plain.
- Flour-water ratio – Depending on how you measure the flour, quality of flour, and how dry the weather is, you may need to add/less water to bring the dough the right wet and sticky consistency. If your dough is dry after you mix it, add water by the tablespoon until it feels perfect.
- You can use Half All-Purpose Flour and Half Whole Wheat flour too instead of only all-purpose flour.
- Make the wet shaggy dough.
- Scoring the bread dough is optional, but it does help the bread expand, giving it more height, and adds a pretty, decorative touch to the top of the loaf.
- If you don’t have a Dutch oven you can bake the bread on a baking sheet or a pizza stone. It won’t rise quite as high but it will work.
- Every oven is different: keep this in mind when baking bread. Some ovens can get much hotter than others and cause the bake to happen much faster. Check on the color of your bread in the last 15 minutes – pull when it’s golden brown on top.
- Keep leftovers fresh by storing them in a ziplock bag in the refrigerator and heat in the oven or toast when ready to enjoy. It will stay up to a week in the fridge.
- This bread freezes beautifully. Let the bread cool completely, then wrap in plastic wrap and place in large freezer-safe bags. You can also slice the bread and then freeze it. It will stay good for up to 2 months.
Remove, thaw, and reheat at 350 until warm in the oven. - This bread is beautifully served alongside any hearty meal or for soup dipping. We also love toasting it and spreading it with butter.
- Swap out dried cranberries with dried raisins, blueberries, cherries, apples, dates, or any dried fruit.
Swap out walnuts with cashew, peanut, pecans, pistachios, almonds, hazelnuts, or even sunflower seeds - You can make this no-knead bread with gluten-free flour.
- You’ll need to take different steps when baking bread with different yeasts.
Instant yeast: If you are using instant yeast like I did today, you can skip dissolving it in water and stir it into your dry ingredients before adding water.
Active dry yeast: If you have active dry yeast on hand, you will need to activate it in water before adding flour.
Nutrition
Warm Regards,
Dhwani.




Hello, Hope your day is going well! For someone who does not own an Instant Pot: all you need to do is adjust the yeast to 2 teaspoons and it will reduce proofing time to about 4 hours. It is that easy!
Great recipe! Do you think it would work as a base for an olive bread? Subbing pitted olives for the nuts and berries? Also, think one could use chocolate chunks and dried cherries successfully?
Thank you!
Yes, absolutely. You can add your choice of add-ins.
I love the similar bread Costco makes and am so happy to have found your recipe. If I don’t mind kneading as I have a stand mixer which does it beautifully, how could I adjust the recipe, or would kneading be bad?
Thx
Thanks. You can knead the dough. Knead the dough for 8 to 10 minutes in your stand mixture, and rest it for an hour or until double in size, form into a ball shape, let it rest for another 45 minutes, and bake it as described in the recipe. Hope this helps.