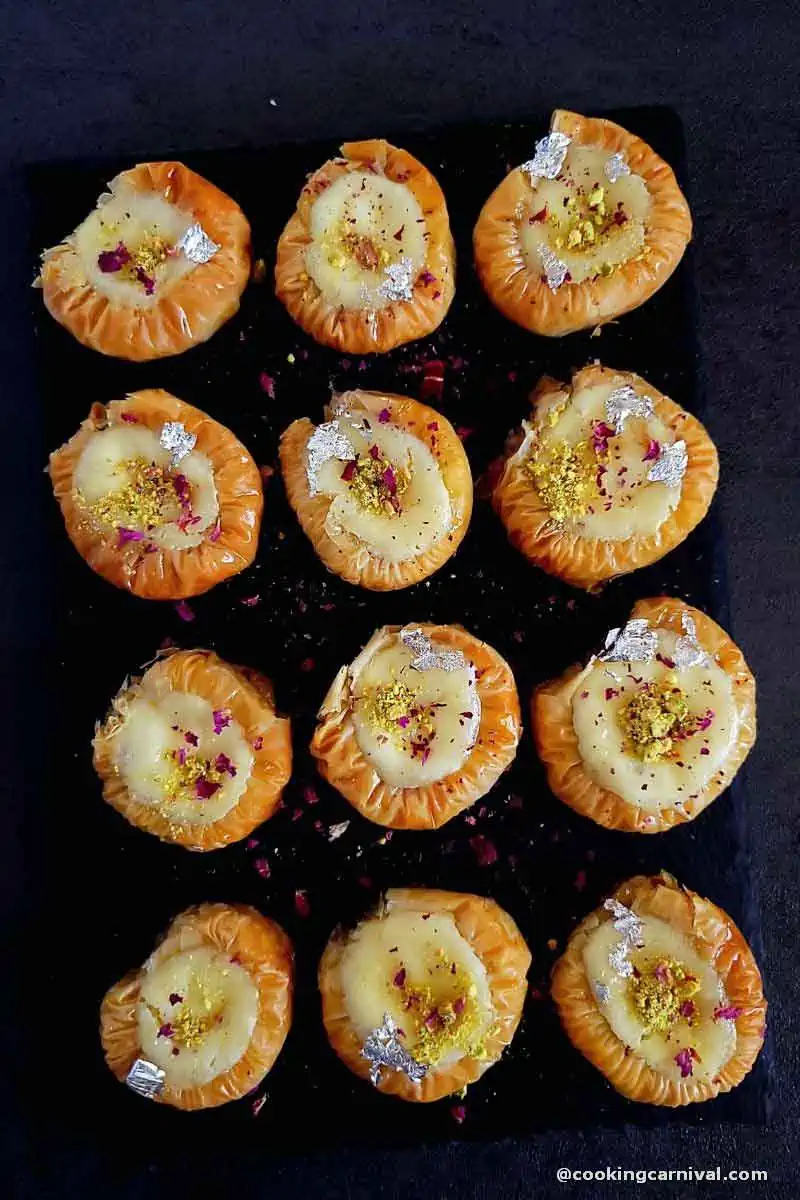
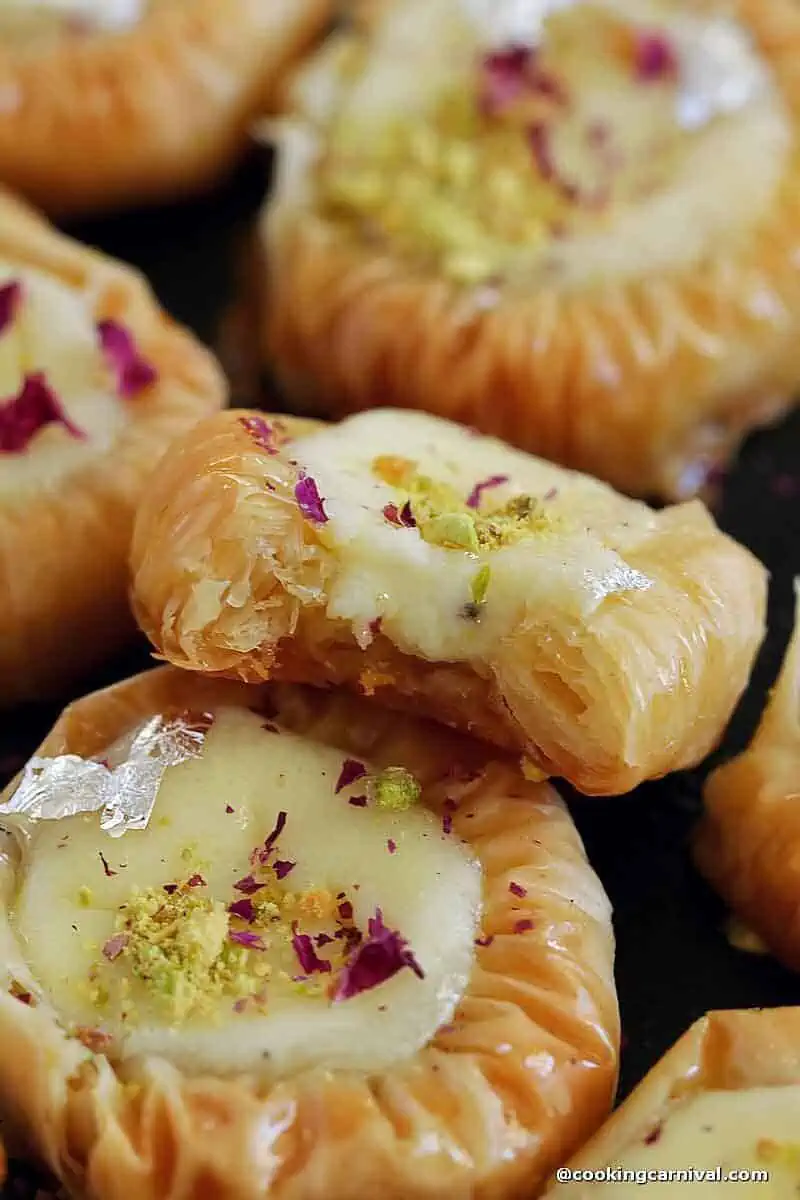
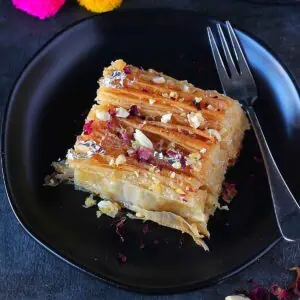
A showstopper, decadent yet easy dessert recipe, this Cheesecake Baklava Bracelet is that dessert recipe you must add to your upcoming Diwali or new year party!
It is lighter than traditional baklava, and in the meantime more exciting flavor profile than traditional cheesecake, the best of both! It’s just the best.
It is crispy and creamy at the same time, hands down the most delicious dessert I have ever made! Let’s learn to make a baklava bracelet recipe with a step-by-step process and video.
Jump to:
About this recipe
Bulbul Yuvasi is a baklava variation that is popular in the Middle East and Eastern Europe.
This is a dessert made with thin filo pastry sheets and is named for resembling a bird’s nest.
They are called by a few different names depending on the region like Asawer El Sit (Lady’s Bracelets), Lady’s Naval, Concertina baklava, Accordion baklava, Baklava bracelet, Baklava coin, etc.
Unlike the classic baklava where the filo sheets are stacked, here the filo sheets are rolled around a thin object (straw, dowel, or chopstick) and shaped to resemble a nest.
The hole in the middle is filled with chopped nuts like pistachios or walnuts, chocolate or spreads after they’ve been baked and drenched in sugar syrup.
Ever since I saw these cute little bite-sized desserts on Instagram, I was itching to try them.
And finally tried them with a twist.
Usually, it is filled with chocolate spread or nuts. But I filled them with cheesecake mixture and baked them with filo pastry.
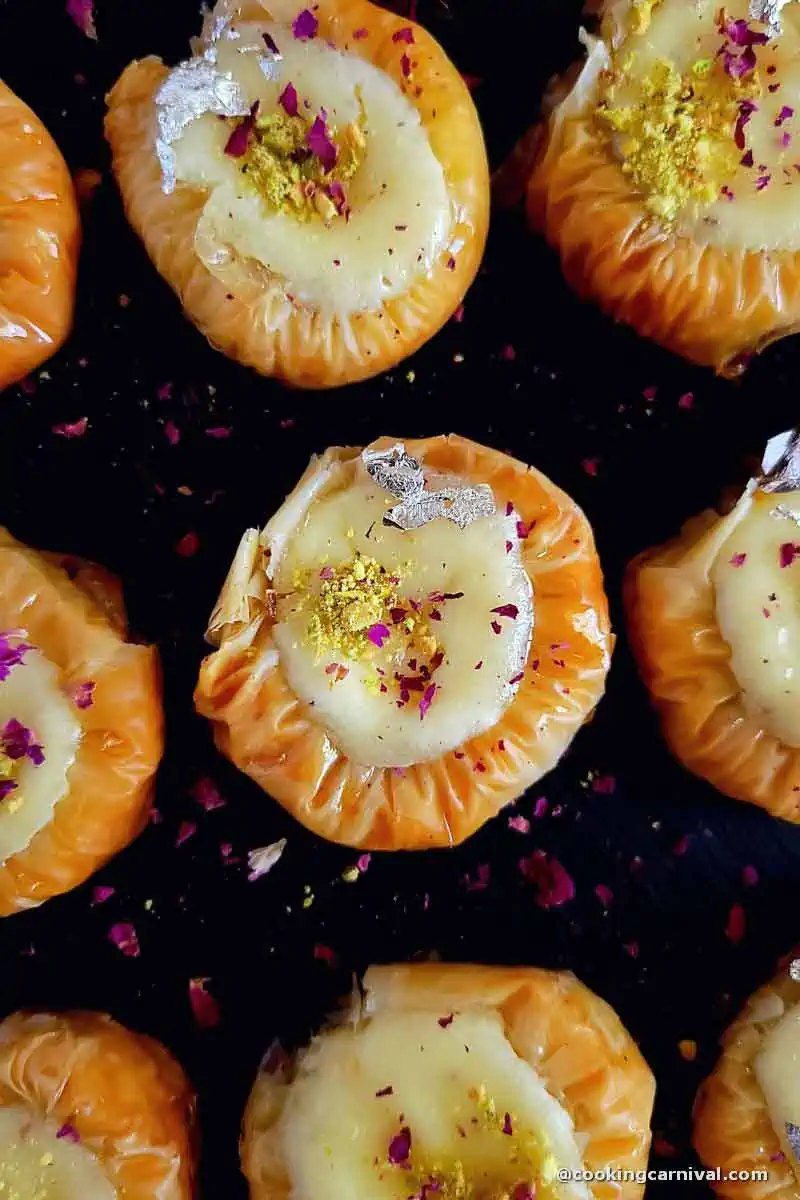
And you guys, it turned out so delicious. Creamy center and crispy crust, the best dessert!
It looks pretty that you would think it is tricky to make, but trust me – these Cheesecake bulbul baklavas are so easy to shape and bake.
Yes, it is a labor of love and takes time. But it is very simple to make.
They are light, crispy, and bite-sized baklavas that are easily addictive.
This a perfect recipe for a Diwali party!
Why do you make Cheesecake Baklava Bracelet recipe?
- This recipe is an Exquisite, aromatic, dreamy dessert for the festive season
- No special equipment is needed.
- Individual servings, no need to slice and serve.
- Can be made ahead of time so perfect for any party or gathering.
- Perfectly Portable looks cute, festive, and adorable.
- One of the biggest advantages is – Portion control.
- This is the perfect recipe even if you are a beginner in the kitchen.
Ingredients needed
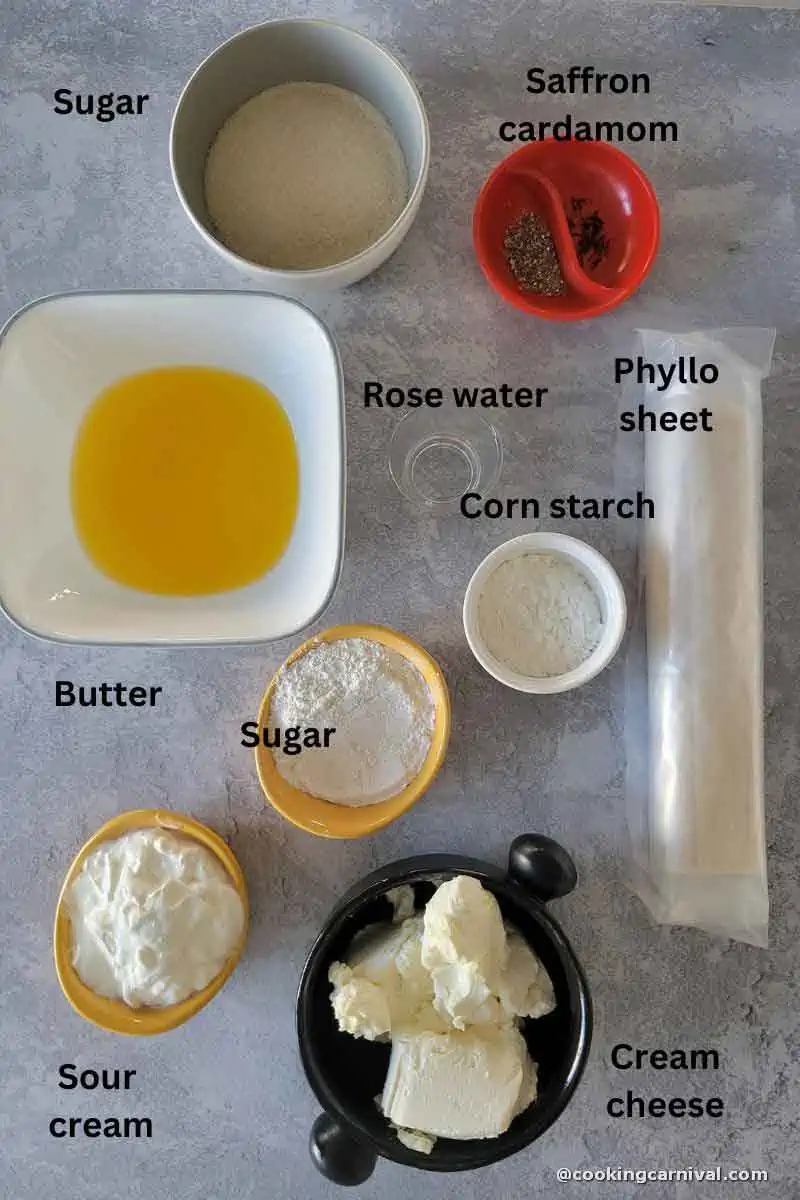
For Cheesecake filling
- Cream cheese – Please use regular cream cheese only, do not use light or fat-free cream cheese.
- Sour cream – Even sour cream adds moisture to the cheesecake. It also adds a little bit of sour tang.
- Whipping cream – Adds some moisture. It also enhances the cake’s velvety texture.
- Corn starch – Adding a small amount of cornstarch to the cheesecake mixture improves the texture, makes the cheesecake more firm and sturdy, and prevents the cheesecake from cracking without changing the flavor.
- Sugar – I have used Organic granulated sugar. You may use powdered sugar too. Add or less according to your taste.
- Flavoring – for the flavorings, I have used saffron, and cardamom powder.
For baklava
- Filo pastry – The phyllo sheets are usually available in the supermarkets either frozen or refrigerated.
- Butter – The butter needs to be melted in the microwave for a few seconds
- For the syrup
- You will need sugar, water, and rose water.
Other
- Steel straw – Not an ingredient but a must-have thing to do the rolling. I have tried with wooden skewers and chopsticks. You can also use a pencil, dowel, etc. Make sure the stick is longer than the cut pastry sheet you are rolling.
Step-by-step process
Step – 1 Sugar syrup
- In a small saucepan, combine the sugar, and water. Set over high heat.
- Let it boil until the syrup is almost to one-thread consistency.
- Tip – To check the consistency, dip a spoon in the syrup and lift out. Allow cooling for a few seconds as it will be very hot at first. Now touch the syrup with a clean forefinger and then touch your thumb and forefinger together and pull them apart gently. One-thread consistency is when a single thread is formed (and does not break) when your forefinger and your thumb are pulled apart gently.
- Add in rose water, mix and Set aside to cool completely before using.

Step – 2 Baklava Bracelet
- Unwrap and unfold the phyllo on a working surface or large cutting board.
- Using a knife, cut the phyllo stack in half.
- Cover phyllo with a damp kitchen towel to prevent it from drying out.
- Take one phyllo sheet, lightly brush it with butter, and place another phyllo sheet on top.
- Again brush lightly with butter.
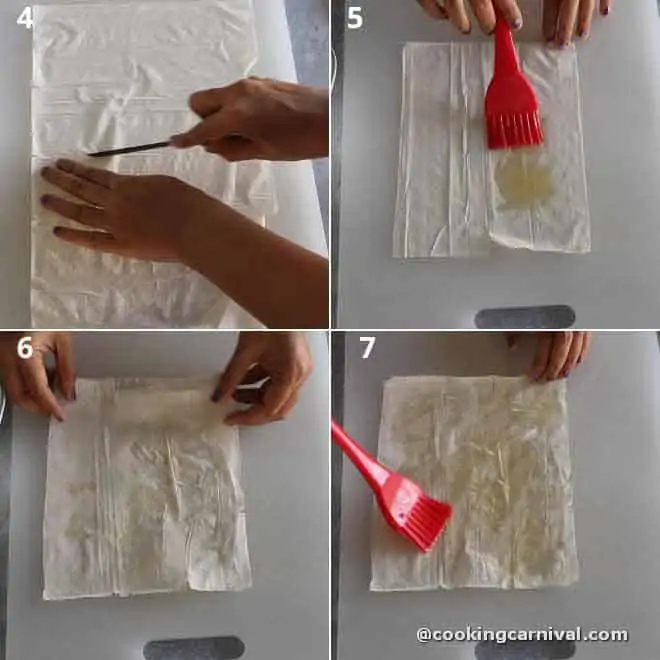
- Then place a steel straw, stick like a dowel, or pencil at the edge nearest to you.
- Loosely roll the phyllo around the rod/straw, leaving the last 3 cm at the end unrolled.
- Note – Make sure to loosely roll the square of phyllo around the rod/straw. If you wrap it too tightly, you’ll have a hard time getting it out of the rod, which could cause tearing.
- Placing each hand on both ends of the rolled phyllo, carefully push both ends towards the center to shrink.
- Slide the shrieked phyllo out of the straw and curve to form a circle, pressing on the ruffled end to form a flat base, making sure it has no gaps or a hole in the middle.
- Press ends together.
- Repeat with remaining phyllo sheets.
- Place Baklava bracelets on a baking sheet. Make sure they are touching one another to reduce the chance of the bracelets opening up during baking.
- Brush bracelets with melted butter. Cover the tray with cling wrap or a kitchen towel.

Step -3 Make the Cheesecake filling
- Preheat oven to 350F.
- In the bowl of a stand mixer fitted with the paddle attachment, or in a large mixing bowl using an electric mixer, mix the cream cheese and sugar until smooth and creamy.
- Please note – do not use a wired balloon whisk for making the batter.
- Add the heavy cream, sour cream, cornstarch, cardamom powder, saffron, and mix until fully combined, stopping to scrape down the sides of the bowl as needed.
- Note – please dont over-mix the batter.

Step 4 assemble and baking
- Now take the cheesecake filling in the piping bag and fill the cavities of prepared fillo bracelets by evenly distributing the batter. Do not overfill them.
- Bake them at 320 degrees F. for about 25 to 30 minutes or until crisp and golden brown.
- As soon as they come out of the oven, pour the cooled sugar syrup over them.
- Note – While drizzling the baklava bracelet with syrup, focus on the side around where the filo pastry is. It is ok to drizzle the cheesecake part a tiny but the main focus should be to moisten the baked phyllo sheets.

- Allow the Cheesecake baklava bracelets to cool completely.
- Now garnish it with crushed pistachios, rose petals, and silver varq.
- Keep it in the fridge until ready to serve. Enjoy!

Notes, Pro-tips, and Quick FAQs
- When arranging these nests, make sure to keep them crowded. This will keep the shape of the nest intact.
- Make sure the sugar syrup is not watery. If it’s on the liquid side, it can make the crust wet and soggy instead of moist. Add rosewater in after the syrup is ready
- While drizzling the baklava bracelet with syrup, focus on the side around where the filo pastry is. It is ok to drizzle the cheesecake part a tiny but the main focus should be to moisten the baked phyllo sheets.
- Make sure you pour the sugar syrup over the baklava bracelet right out of the oven.
- Make sure your cream cheese, whipping cream, sour cream, and phyllo sheets are at room temperature.
- Keep the rest of the sheets covered with a damp tea towel while working with 2 of them.
- Don’t mix the batter for too long. The longer you mix the cheesecake batter, the batter becomes too runny.
- Please note – do not use a wired balloon whisk for making the cheesecake filling.
- Be gentle while removing individual phyllo sheets.
I do not recommend freezing this cheesecake, the filo dough might lose its crispiness
The crust will not be very crisp, but it’s not a soggy mess after refrigeration. The outer layers do stay somewhat crispy.
No, I do not recommend substituting phyllo with puff pastry. Both are different.
Any leftovers can be stored in an air-tight container in the fridge for 3 to 4 days. I suggest you cover the dessert so it does not absorb any smell from the fridge.
More Fusion dessert recipes
Have you tried this Recipe? Please feed us with your feedback, ★ star ratings, and comments below.
You can also FOLLOW me on FACEBOOK, INSTAGRAM, and PINTEREST for more fabulous recipes and updates.
Subscribe to our YouTube Channel for tasty and easy video recipes.
Cheesecake Baklava Bracelet
Ingredients
For cheese cake filling
- 8 oz regular cream cheese room temperature
- ½ cup sour cream room temperature
- ½ cup heavy whipping cream room temperature
- ⅓ cup granulated sugar
- 2 tablespoon corn starch
- ⅛ teaspoon saffron
- ½ teaspoon cardamom powder
For Sugar syrup
- ¾ cup sugar
- 2 cup water
- 3 tablespoon rose water
For Baklava crust
- 450 gram Filo pastry dough/sheet I have used Athens brand (Thawed according to the package instruction)
- 1 cup butter Melted
Other ingredients
- 4 tablespoon crushed pistachios
- Rose petals and silver varq for garnishing
Instructions
Step – 1 Sugar syrup
- In a small saucepan, combine the sugar, and water. Set over high heat.
- Let it boil until the syrup is almost to one-thread consistency.
- Tip – To check the consistency, dip a spoon in the syrup and lift out. Allow cooling for a few seconds as it will be very hot at first. Now touch the syrup with a clean forefinger and then touch your thumb and forefinger together and pull them apart gently. One-thread consistency is when a single thread is formed (and does not break) when your forefinger and your thumb are pulled apart gently.
- Add in rose water, mix and Set aside to cool completely before using.
Step – 2 Baklava Bracelet
- Unwrap and unfold the phyllo on a working surface or large cutting board.
- Using a knife, cut the phyllo stack in half.
- Cover phyllo with a damp kitchen towel to prevent it from drying out.
- Take one phyllo sheet, lightly brush it with butter, and place another phyllo sheet on top.
- Again brush lightly with butter. Then place a steel straw, stick like a dowel, or pencil at the edge nearest to you.
- Loosely roll the phyllo around the rod/straw, leaving the last 3 cm at the end unrolled.
- Note – Make sure to loosely roll the square of phyllo around the rod/straw. If you wrap it too tightly, you’ll have a hard time getting it out of the rod, which could cause tearing.
- Placing each hand on both ends of the rolled phyllo, carefully push both ends towards the center to shrink.
- Slide the shrieked phyllo out of the straw and curve to form a circle, pressing on the ruffled end to form a flat base, making sure it has no gaps or a hole in the middle.
- Press ends together.
- Repeat with remaining phyllo sheets.
- Place Baklava bracelets on a baking sheet. Make sure they are touching one another to reduce the chance of the bracelets opening up during baking.
- Brush bracelets with melted butter. Cover the tray with cling wrap or a kitchen towel.
Step -3 Make the Cheesecake filling
- Preheat oven to 350F.
- In the bowl of a stand mixer fitted with the paddle attachment, or in a large mixing bowl using an electric mixer, mix the cream cheese and sugar until smooth and creamy.
- Please note – do not use a wired balloon whisk for making the batter.
- Add the heavy cream, sour cream, cornstarch, cardamom powder, saffron, and mix until fully combined, stopping to scrape down the sides of the bowl as needed.
- Note – please dont over-mix the batter
Step 4 assemble and baking
- Now take the cheesecake filling in the piping bag and fill the cavities of prepared fillo bracelets by evenly distributing the batter. Do not overfill them.
- Bake them at 320 degrees F. for about 25 to 30 minutes or until crisp and golden brown.
- As soon as they come out of the oven, pour the cooled sugar syrup over them.
- Note – While drizzling the baklava bracelet with syrup, focus on the side around where the filo pastry is. It is ok to drizzle the cheesecake part a tiny but the main focus should be to moisten the baked phyllo sheets.
- Allow the Cheesecake baklava bracelets to cool completely.
- Now garnish it with crushed pistachios, rose petals, and silver varq.
- Keep it in the fridge until ready to serve. Enjoy!
Video
Notes
- When arranging these nests, make sure to keep them crowded. This will keep the shape of the nest intact.
- Make sure the sugar syrup is not watery. If it’s on the liquid side, it can make the crust wet and soggy instead of moist. Add rosewater in after the syrup is ready
- While drizzling the baklava bracelet with syrup, focus on the side around where the filo pastry is. It is ok to drizzle the cheesecake part a tiny but the main focus should be to moisten the baked phyllo sheets.
- Make sure you pour the sugar syrup over the baklava bracelet right out of the oven.
- Make sure your cream cheese, whipping cream, sour cream, and phyllo sheets are at room temperature.
- Keep the rest of the sheets covered with a damp tea towel while working with 2 of them.
- Don’t mix the batter for too long. The longer you mix the cheesecake batter, the batter becomes too runny.
- Please note – do not use a wired balloon whisk for making the cheesecake filling.
- Be gentle while removing individual phyllo sheets.
Nutrition
Warm Regards,
Dhwani.



Leave a Reply